Phira-docs Instruction
This is the instruction of Phira-related documentation, visit GitHub to submit feedbacks or contribute, read in other language by editing the url, for example /en/
If you’re willing to provide translation, please refer to
Provide the translated .po file in the Pull Request, and add the corresponding language code in LANGUAGES in env in the .github/mdbook.yml file, visit ISO 639 for language code reference
Respack
In prpr, you can customize the respack. The respack consists of how the notes look, particle effects, hit sound effects, etc. You can find premade respacks, or you choose to make one yourself. The file structure of the respack is explained in detailed below.
Structure
A Respack is a single zip archive containing the configuration file info.yml and other resource files. Some of the resource files are required and some are optional.
Resource files
The resource files must include:
click.pngandclick_mh.png: The note skin for click notes,mhrepresents simultaneous clicks.drag.pnganddrag_mh.png: The note skin for drag notes,mhrepresents simultaneous drags.flick.pngandflick_mh.png: The note skin for flick notes,mhrepresents simultaneous flicks.hold.pngandhold_mh.png: The note skin for hold notes,mhrepresents simultaneous holds.hit_fx.png: The image for hit effect.
The resource files can also include (If they are not included, the default will be used):
click.ogg,drag.oggandflick.ogg: The sound effects for the corresponding notes, note that the sampling rate must be 44100 Hz, or else it will cause crashes during rendering (prpr-render).ending.ogg:结算界面背景音乐。
Configuration file
The configuration file uses yml format, with the following required fields (using a default respack as an example):
name: Default
author: "Mivik & MisaLiu"
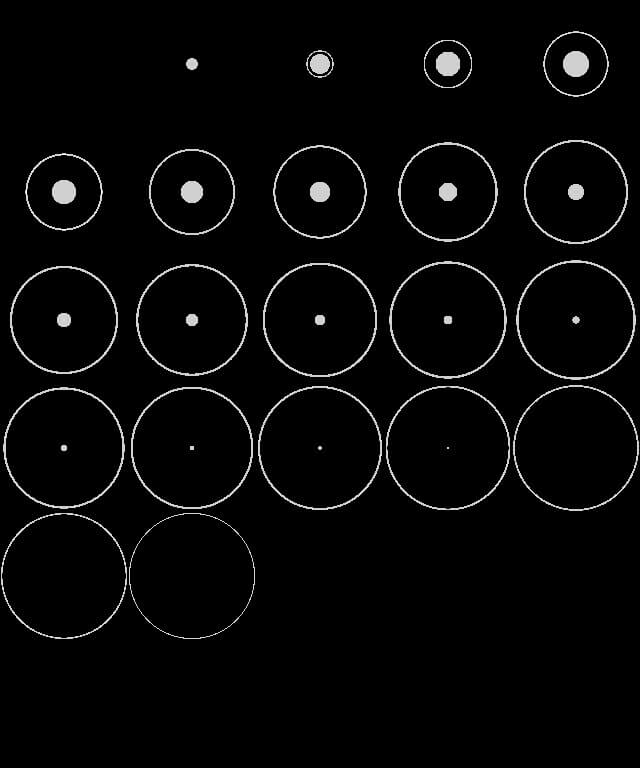
hitFx: [5, 6]
holdAtlas: [50, 50]
holdAtlasMH: [50, 110]
name: The name of the respack.author: The author/creator of the respack.description: The description/introduction of the respack.hitFx: The frame count of the width and height of the hit effect. Hit effects are stored as multiple frames in a single image, thus, it is necessary to specify the number of horizontal and vertical frames in the image. For example, in this image, the horizontal and vertical frame count is 5 and 6 respectively (the last row is not very visible, but it is present there) (the image uses a black background for the ease of viewing, but a transparent background should be used when creating a respack).holdAtlas: The height of the tail and head of the hold image. The note skin of the hold is an image, it has the tail section, middle section and the head section, from top to bottom of the image. The 2 numbers ofholdAtlasspecify the height of the tail and head respectively in the image. For example, in this image, the height of the tail and head section are both 50 pixels.holdAtlasMH: Similar to the previous bullet point, specifies the related details for simultaneous holds.
In addition, there are these optional fields:
hitFxDuration(float, default value:0.5): The duration of the hit effect in seconds.hitFxScale(float, default value:1.0): The scale of the hit effect.hitFxRotate(bool, default value:false): Whether the hit effect rotates with the note.hitFxTinted(bool, default value:true): Whether the hit effect is colored according to the color of the judgement line.hideParticles(bool, default value:false): Whether the hit effect particles are hidden.holdKeepHead(bool, default value:false): Whether to keep showing the hold’s head section once it touches the line.holdRepeat(bool. default value:false): Whether the middle section of the hold is repetitively stretched. The below shows 3 images, the hold’s image on the left, the image of how the hold will look like whenholdRepeatis false on the middle, and the image of how the hold will look like whenholdRepeatis true on the right.holdCompact(布尔值,默认false):是否把 Hold 的头部和尾部与 Hold 中间重叠(将锚点居中)。还是用上面的 示例,如果不开启holdCompact,效果就会是左边第一张图,Hold 的头尾是和中间隔开的;而右边两张图都是开启了holdCompact的效果;colorPerfect(Hexadecimal color code, default value:0xe1ffec9f): The color of the judgement line when it is still AP (All Perfect).colorGood(Hexadecimal color code, default value:0xebb4e1ff): The color of the judgement line when it is still FC (Full Combo).
Phira 谱面标准
谱面基本结构
Phira 谱面包是一个压缩包, 解压后的压缩包内应当直接包含以下文件而非文件夹:
info.yml: 采用 YAML 格式的谱面信息文件- …
info.yml中所指定的其他文件
各文件支持情况
谱面文件
见 谱面文件格式
音乐文件
见 音乐文件格式
TBD
常见问题
RPE 的谱面 JSON 文件存储了元数据(创作者, 难度, 名称等), 这一行为是不被推荐的, 这会导致这部分信息可能被重复记录, 从而导致不一致性. Phira 的行为以 info.yml 为准
谱面信息格式
谱面信息是一种 元数据 , 用于描述谱面数据之外的的基本信息, 例如作者, 插图, 音乐信息等.
谱面信息存在两种变体, ChartInfo 和 BriefChartInfo, 谱面信息 (ChartInfo) 的存储采用 YAML 格式, 谱面的 info.yml 文件即为 ChartInfo 的实例
本地导入时会自动填充 ChartInfo 的所有字段, 但 YAML 格式本身并不难懂, 若希望填写好后一并打包导入来节省时间, 则需要注意以下字段的填写
ChartInfo
请参考源代码中的定义, 可能存在更新
谱面 ID id
不必需, i32 整数, 默认为空
用于标识谱面的唯一 ID, 与服务器中的 ID 保持一致, Phira 客户端会根据此 ID 来判断是否需要更新谱面
本地谱面该项为空
上传者 ID uploader
不必需, i32 整数, 默认为空
用于标识上传者的唯一 ID, 与服务器中的 ID 保持一致, 用于显示在线谱面的上传者信息
本地谱面该项为空
谱面名称 name
必需, String 字符串, 默认为 “UK”
谱面的名称
难度 difficulty
必需, f32 浮点数, 默认为 10.0
谱面的难度, 别乱来哈
难度等级 level
必需, String 字符串, 默认为 “UK Lv.10”
显示在游玩时屏幕右下角的难度等级
谱面作者 charter
必需, String 字符串, 默认为 “UK”
这谱谁写的.jpg
音乐作者 composer
必需, String 字符串, 默认为 “UK”
音乐的作者
插图作者 illustrator
必需, String 字符串, 默认为 “UK”
谱面的插图作者
谱面文件名 chart
必需, String 字符串, 默认为 “chart.json”
谱面文件的文件名, RPE 生成的谱面通常为 chart.json, PE 生成的谱面通常为 xxx.pec
谱面格式 format
不必需, ChartFormat 枚举, 默认为空
谱面的格式, 不应当手动填写, 由 Phira 客户端自动识别并写入, 出于完整性需求在这里列出
音乐文件名 music
必需, String 字符串, 默认为 “song.mp3”
音乐文件的文件名
插图文件名 illustration
必需, String 字符串, 默认为 “background.png”
插图文件的文件名
解锁视频 unlockVideo
不必需, String 字符串, 默认为空
解锁该谱面的视频文件名
预览开始时间 previewStart
必需, f32 浮点数, 默认为 0.0
音乐预览开始的时间(秒)
预览结束时间 previewEnd
不必需, f32 浮点数, 默认为空
音乐预览结束的时间(秒), 留空则视为预览开始时间后 15.0 秒, 若超出结尾则会被截断
源代码: 截断
纵横比 aspectRatio
必需, f32 浮点数, 默认为 16.0 / 9.0
注意: 谱面显示的纵横比, 设备的纵横比大于此值(例如部分加长手机, 或者一般手机上此值填写为 4:3)时会保证谱面处于该值的纵横比, 而小于此值时会拉伸谱面以保证谱面填满屏幕(来源: TBD)
背景暗化程度 backgroundDim
必需, f32 浮点数, 默认为 0.6
谱面背景的暗化程度, 为背景上方矩形的不透明度
判定线长度 lineLength
必需, f32 浮点数, 默认为 6.0
谱面中线条的长度, 单位待补充(涉及到渲染细节, 文档待补充)
谱面延迟 offset
必需, f32 浮点数, 默认为 0.0
谱面相对于音乐之间的时间延迟(秒), 即该值为正时相比于该值为零时:
- 若两种情况中音乐同时开始, 则
offset为正时谱面开始更晚 - 若两种情况中谱面同时开始, 则
offset为正时音乐开始更早
提示 tip
不必需, String 字符串, 默认为空
Tip: 不写的话会给你塞一条别的
标签 tags
必需, String 字符串数组, 默认为空
谱面的标签, 用于分类和搜索, 标签相关文档待补充
简介 intro
必需, String 字符串, 默认为空
谱面的简介
长条选项 holdPartialCover
必需, bool 布尔值, 默认为 false
Hold 音符的遮罩位置,若为 true 则为尾部,否则为头部
创建时间 created
不必需, DateTime<Utc> 可选的 UTC 时间, 默认为空
谱面创建的时间, 不应当手动填写, 由 Phira 客户端自动写入
更新时间 updated
不必需, DateTime<Utc> 可选的 UTC 时间, 默认为空
本地谱面最近一次更新的时间, 不应当手动填写, 由 Phira 客户端自动写入
谱面更新时间 chartUpdated
不必需, DateTime<Utc> 可选的 UTC 时间, 默认为空
云端谱面最近一次更新的时间, 不应当手动填写, 由 Phira 客户端自动写入. 用于判断是否需要更新谱面
BriefChartInfo
BriefChartInfo 是 ChartInfo 的一个简化版本, 用于在不需要详细信息的场景下使用. 以下是 BriefChartInfo 的主要字段:
TBD
谱面文件格式
目前支持的谱面文件格式包括:
格式的推断通过 info.yml 中的 format 字段进行, 若为空则通过文件内容进行推断.
注意: 忽略谱面文件的后缀名
RPE 文档
本文档在2024.7.25开始编辑,在2024.8.25正式完成且持续更新。
详情见左侧目录。
RPE谱面根目录结构
警告:以下所有内容从编写开始时间(2024.7.25)最新RPE版本1.4.1开始编写,更早的加入版本等信息全部待补充。
谱面根目录结构
BPMList
BPMList 是一个 JsonArray 类型字段,包含若干个 JsonObject。 每个JsonObject包含以下字段:
| 字段名 | 类型 | 说明 | 加入版本 |
|---|---|---|---|
| bpm | float | BPM值 | - |
| startTime | beat | BPM开始时间 | - |
META
META 是一个 JsonObject 类型字段,包含以下字段:
| 字段名 | 类型 | 说明 | 加入版本 |
|---|---|---|---|
| RPEVersion | int | RPE版本,100~160 | - |
| background | string | 背景图片相对于谱面根目录路径 | - |
| charter | string | 谱师名义 | - |
| composer | string | 曲师 | - |
| id | string | 谱面ID,在RPE中用于识别谱面 | - |
| illustration | string | 曲绘画师 | 141 |
| level | string | 谱面等级 | - |
| name | string | 谱面名称 | - |
| offset | int | 音乐偏移,单位为毫秒 | - |
| song | string | 音乐文件相对于谱面根目录路径 | - |
offset字段为负数时,音乐应该在谱面开始前-offset毫秒时播放;为正数时,音乐应该在谱面开始后offset毫秒时播放。id字段在RPE自动生成时为long,实际上这个值可以随便篡改为任何字符,所以在实际谱面中存储方式为string类型。- RPE 1.5.0 ~ RPE 1.6.0 之间的版本(不含RPE 1.6.0,含Alpha版本),META中的
RPEVersion字段保持为150,没有被更改。 - RPE 1.6.1 版本,META中的
RPEVersion字段的值保持为160,没有被更改。
chartTime
模拟器不需要本属性。
chartTime是一个double类型字段,值的时间单位是秒,表示谱面编辑时长,在141版本加入。在RPE中,如果谱师在30秒内没有编辑谱面,则该值将不再变动,下次开始编辑后继续计时。(特性被移除)- 如果RPE失去焦点,RPE仍会继续计时,若RPE重新获得焦点,计时将回溯至失去焦点时的时间。
judgeLineGroup
模拟器不需要本属性。
judgeLineGroup是一个string[]类型字段;- 每一个
string为一个判定线组。 - 实际行为待补充。
judgeLineList
judgeLineList是一个JsonArray类型字段,包含若干个 JudgeLine。
multiLineString
模拟器不需要本属性。
multiLineString是一个string类型字段,在RPE中多线编辑时使用,以空格分割,每个数字代表一个判定线。multiLineString中也可能含有:,1:20将选中1到20号的所有判定线。
multiScale
模拟器不需要本属性。
multiScale是一个float,在RPE中用于缩放多线编辑页面的大小。
xybind
模拟器没必要读取本属性。
xybind是一个bool,用于指示本谱面是否启用了XY绑定。- 若为
true,则表示启用了XY绑定,则每一个XEvent一定有一个对应同等长度的YEvent。
judgeLine
每一个judgeLine(判定线)都含有以下字段:
| 字段名 | 类型 | 描述 | 默认值 | 加入版本 |
|---|---|---|---|---|
| Group | int | 判定线所属组 | 0 | - |
| Name | string | 判定线名称 | Untitled | - |
| Texture | string | 判定线纹理,若非默认值,则为相对于谱面根目录的路径,更多详见Texture | line.png | - |
| anchor | float[2] | 判定线纹理锚点,详见 extend | [ 0.5, 0.5 ] | 142 |
| eventLayers | EventLayer[]? | 事件层级,默认包含至少一个层级,最大有五个,层级下事件见 event | - | - |
| extended | JsonObject | 特殊事件层,详见 extend Event | - | - |
| father | int | 父线,-1 表示无父线 | - | - |
| isCover | int | 遮罩 | 1 | - |
| notes | Note[] | 线上所有的Note,详见 note | - | - |
| numOfNotes | int | Note总数量(包含 FakeNote,不包含 Hold) | 0 | - |
| zOrder | int | 线z轴(即图层),范围为±100(范围需要验证) | 0 | - |
| attachUI | string? | UI绑定,详见 extend;无绑定情况下,不存在本字段 | - | - |
| isGif | bool | 纹理是否为GIF,若为 true ,Texture为一个GIF文件 | false | 150 |
| posControl | JsonArray | 详见Controls | - | - |
| sizeControl | JsonArray | 详见Controls | - | - |
| skewControl | JsonArray | 详见Controls | - | - |
| yControl | JsonArray | 详见Controls | - | - |
| alphaControl | JsonArray | 详见Controls | - | - |
| bpmfactor | float | BPM因子 此字段无法在RPE中编辑 | 1.0 | - |
| rotateWithFather | bool | 子线是否继承父线的旋转角度,若为 true 则继承,否则不继承 | true | 163 |
- 若层级为空,在某个版本之前,字段为
null,在某个版本及以后,空层级无字段。(当前已知至少在143版本时无字段)- 若某个层级中的某个事件不存在,则该事件字段不会出现。
- 若所有层级都为空,
eventLayers字段不会出现。
- 判定线的当前
BPM应为 当前BPM除以bpmfactor,而非乘以。 - 父线允许嵌套,父线是否影响子线的旋转角度取决于
rotateWithFather是否为true,若不存在此字段应视为false(兼容163以前的版本)。 isCover字段在RPE中为1时,表示遮罩,其他值为不遮罩;遮罩时,位于判定线背面的音符(如果音符Above不为 1 则为正面)不会渲染,反之则渲染(除非已被打击,则不渲染)。
事件插值
Python 示例
- 定义
rpe_easing.py(略) - 定义
Chart_Objects_Rpe.py(部分略)
from __future__ import annotations

import typing
from dataclasses import dataclass
from functools import lru_cache, cache

import rpe_easing

def easing_interpolation(
    t: float, st: float,
    et: float, sv: float,
    ev: float, f: typing.Callable[[float], float]
):
    if t == st: return sv
    return f((t - st) / (et - st)) * (ev - sv) + sv

def conrpepos(x: float, y: float):
    return (x + 675) / 1350, 1.0 - (y + 450) / 900

def _init_events(es: list[LineEvent]):
    aes = []
    for i, e in enumerate(es):
        if i != len(es) - 1:
            ne = es[i + 1]
            if e.endTime.value < ne.startTime.value:
                aes.append(LineEvent(e.endTime, ne.startTime, e.end, e.end, 1))
    es.extend(aes)
    es.sort(key = lambda x: x.startTime.value)
    if es: es.append(LineEvent(es[-1].endTime, Beat(31250000, 0, 1), es[-1].end, es[-1].end, 1))

@dataclass
class Beat:
    var1: int
    var2: int
    var3: int

    def __post_init__(self):
        self.value = self.var1 + (self.var2 / self.var3)
        self._hash = hash(self.value)

    def __hash__(self) -> int:
        return self._hash

@dataclass
class Note:
    ...

@dataclass
class LineEvent:
    ...
    easingFunc: typing.Callable[[float], float] = rpe_easing.ease_funcs[0]

    def __post_init__(self):
        if not isinstance(self.easingType, int): self.easingType = 1
        self.easingType = 1 if self.easingType < 1 else (len(rpe_easing.ease_funcs) if self.easingType > len(rpe_easing.ease_funcs) else self.easingType)
        self.easingFunc = rpe_easing.ease_funcs[self.easingType - 1]

@dataclass
class EventLayer:
    ...

    def __post_init__(self):
        self.speedEvents.sort(key = lambda x: x.startTime.value)
        self.moveXEvents.sort(key = lambda x: x.startTime.value)
        self.moveYEvents.sort(key = lambda x: x.startTime.value)
        self.rotateEvents.sort(key = lambda x: x.startTime.value)
        self.alphaEvents.sort(key = lambda x: x.startTime.value)

        _init_events(self.speedEvents)
        _init_events(self.moveXEvents)
        _init_events(self.moveYEvents)
        _init_events(self.rotateEvents)
        _init_events(self.alphaEvents)

@dataclass
class Extended:
    ...

    def __post_init__(self):
        self.scaleXEvents.sort(key = lambda x: x.startTime.value)
        self.scaleYEvents.sort(key = lambda x: x.startTime.value)
        self.colorEvents.sort(key = lambda x: x.startTime.value)
        self.textEvents.sort(key = lambda x: x.startTime.value)

        _init_events(self.scaleXEvents)
        _init_events(self.scaleYEvents)
        _init_events(self.colorEvents)
        _init_events(self.textEvents)

@dataclass
class MetaData:
    ...

@dataclass
class BPMEvent:
    ...

@dataclass
class JudgeLine:
    ...

    def GetEventValue(self, t: float, es: list[LineEvent], default):
        for e in es:
            if e.startTime.value <= t <= e.endTime.value:
                if isinstance(e.start, float|int):
                    return easing_interpolation(t, e.startTime.value, e.endTime.value, e.start, e.end, e.easingFunc)
                elif isinstance(e.start, str):
                    return e.start
                elif isinstance(e.start, list):
                    r = easing_interpolation(t, e.startTime.value, e.endTime.value, e.start[0], e.end[0], e.easingFunc)
                    g = easing_interpolation(t, e.startTime.value, e.endTime.value, e.start[1], e.end[1], e.easingFunc)
                    b = easing_interpolation(t, e.startTime.value, e.endTime.value, e.start[2], e.end[2], e.easingFunc)
                    return (r, g, b)
        return default

    @lru_cache
    def GetPos(self, t: float, master: Rpe_Chart) -> list[float, float]:
        linePos = [0.0, 0.0]
        for layer in self.eventLayers:
            linePos[0] += self.GetEventValue(t, layer.moveXEvents, 0.0)
            linePos[1] += self.GetEventValue(t, layer.moveYEvents, 0.0)
        if self.father != -1:
            try:
                fatherPos = master.JudgeLineList[self.father].GetPos(t, master)
                linePos = list(map(lambda x, y: x + y, linePos, fatherPos))
            except IndexError:
                pass
        return linePos

    def GetState(self, t: float, defaultColor: tuple[int, int, int], master: Rpe_Chart) -> tuple[tuple[float, float], float, float, tuple[int, int, int], float, float, str|None]:
        "linePos, lineAlpha, lineRotate, lineColor, lineScaleX, lineScaleY, lineText"
        linePos = self.GetPos(t, master)
        lineAlpha = 0.0
        lineRotate = 0.0
        lineColor = defaultColor if not self.extended.textEvents else (255, 255, 255)
        lineScaleX = 1.0
        lineScaleY = 1.0
        lineText = None

        for layer in self.eventLayers:
            lineAlpha += self.GetEventValue(t, layer.alphaEvents, 0.0 if (t >= 0.0 or self.attachUI is not None) else -255.0)
            lineRotate += self.GetEventValue(t, layer.rotateEvents, 0.0)

        if self.extended:
            lineScaleX = self.GetEventValue(t, self.extended.scaleXEvents, lineScaleX)
            lineScaleY = self.GetEventValue(t, self.extended.scaleYEvents, lineScaleY)
            lineColor = self.GetEventValue(t, self.extended.colorEvents, lineColor)
            lineText = self.GetEventValue(t, self.extended.textEvents, lineText)

        return conrpepos(*linePos), lineAlpha / 255, lineRotate, lineColor, lineScaleX, lineScaleY, lineText

    def __hash__(self) -> int:
        return id(self)

    def __eq__(self, oth) -> bool:
        if isinstance(oth, JudgeLine):
            return self is oth
        return False

@dataclass
class Rpe_Chart:
    ...

    def __post_init__(self):
        self.BPMList.sort(key=lambda x: x.startTime.value)

    @cache
    def sec2beat(self, t: float, bpmfactor: float):
        beat = 0.0
        for i, e in enumerate(self.BPMList):
            bpmv = e.bpm * bpmfactor
            if i != len(self.BPMList) - 1:
                et_beat = self.BPMList[i + 1].startTime.value - e.startTime.value
                et_sec = et_beat * (60 / bpmv)

                if t >= et_sec:
                    beat += et_beat
                    t -= et_sec
                else:
                    beat += t / (60 / bpmv)
                    break
            else:
                beat += t / (60 / bpmv)
        return beat

    @cache
    def beat2sec(self, t: float, bpmfactor: float):
        sec = 0.0
        for i, e in enumerate(self.BPMList):
            bpmv = e.bpm * bpmfactor
            if i != len(self.BPMList) - 1:
                et_beat = self.BPMList[i + 1].startTime.value - e.startTime.value

                if t >= et_beat:
                    sec += et_beat * (60 / bpmv)
                    t -= et_beat
                else:
                    sec += t * (60 / bpmv)
                    break
            else:
                sec += t * (60 / bpmv)
        return sec

    def __hash__(self) -> int:
        return id(self)

    def __eq__(self, oth) -> bool:
        if isinstance(oth, JudgeLine):
            return self is oth
        return False
- 加载谱面:
def load(chart: dict):
    meta = chart.get("META", {})
    rpe_chart_obj = Chart_Objects_Rpe.Rpe_Chart(
        META = Chart_Objects_Rpe.MetaData(
            RPEVersion = meta.get("RPEVersion", -1),
            offset = meta.get("offset", 0),
            name = meta.get("name", "Unknow"),
            id = meta.get("id", "-1"),
            song = meta.get("song", "Unknow"),
            background = meta.get("background", "Unknow"),
            composer = meta.get("composer", "Unknow"),
            charter = meta.get("charter", "Unknow"),
            level = meta.get("level", "Unknow"),
        ),
        BPMList = [
            Chart_Objects_Rpe.BPMEvent(
                startTime = Chart_Objects_Rpe.Beat(
                    *BPMEvent_item.get("startTime", [0, 0, 1])
                ),
                bpm = BPMEvent_item.get("bpm", 140)
            )
            for BPMEvent_item in chart.get("BPMList", [])
        ],
        JudgeLineList = [
            Chart_Objects_Rpe.JudgeLine(
                isCover = judgeLine_item.get("isCover", 1),
                Texture = judgeLine_item.get("Texture", "line.png"),
                attachUI = judgeLine_item.get("attachUI", None),
                bpmfactor = judgeLine_item.get("bpmfactor", 1.0),
                father = judgeLine_item.get("father", -1),
                zOrder = judgeLine_item.get("zOrder", 0),
                eventLayers = [
                    Chart_Objects_Rpe.EventLayer(
                        speedEvents = [
                            Chart_Objects_Rpe.LineEvent(
                                startTime = Chart_Objects_Rpe.Beat(
                                    *LineEvent_item.get("startTime", [0, 0, 1])
                                ),
                                endTime = Chart_Objects_Rpe.Beat(
                                    *LineEvent_item.get("endTime", [0, 0, 1])
                                ),
                                start = LineEvent_item.get("start", 0.0),
                                end = LineEvent_item.get("end", 0.0),
                                easingType = 1
                            )
                            for LineEvent_item in EventLayer_item.get("speedEvents", [])
                        ] if EventLayer_item.get("speedEvents", []) is not None else [],
                        moveXEvents = [
                            Chart_Objects_Rpe.LineEvent(
                                startTime = Chart_Objects_Rpe.Beat(
                                    *LineEvent_item.get("startTime", [0, 0, 1])
                                ),
                                endTime = Chart_Objects_Rpe.Beat(
                                    *LineEvent_item.get("endTime", [0, 0, 1])
                                ),
                                start = LineEvent_item.get("start", 0.0),
                                end = LineEvent_item.get("end", 0.0),
                                easingType = LineEvent_item.get("easingType", 1)
                            ) for LineEvent_item in EventLayer_item.get("moveXEvents", [])
                        ] if EventLayer_item.get("moveXEvents", []) is not None else [],
                        moveYEvents = [
                            Chart_Objects_Rpe.LineEvent(
                                startTime = Chart_Objects_Rpe.Beat(
                                    *LineEvent_item.get("startTime", [0, 0, 1])
                                ),
                                endTime = Chart_Objects_Rpe.Beat(
                                    *LineEvent_item.get("endTime", [0, 0, 1])
                                ),
                                start = LineEvent_item.get("start", 0.0),
                                end = LineEvent_item.get("end", 0.0),
                                easingType = LineEvent_item.get("easingType", 1)
                            ) for LineEvent_item in EventLayer_item.get("moveYEvents", [])
                        ] if EventLayer_item.get("moveYEvents", []) is not None else [],
                        rotateEvents = [
                            Chart_Objects_Rpe.LineEvent(
                                startTime = Chart_Objects_Rpe.Beat(
                                    *LineEvent_item.get("startTime", [0, 0, 1])
                                ),
                                endTime = Chart_Objects_Rpe.Beat(
                                    *LineEvent_item.get("endTime", [0, 0, 1])
                                ),
                                start = LineEvent_item.get("start", 0.0),
                                end = LineEvent_item.get("end", 0.0),
                                easingType = LineEvent_item.get("easingType", 1)
                            ) for LineEvent_item in EventLayer_item.get("rotateEvents", [])
                        ] if EventLayer_item.get("rotateEvents", []) is not None else [],
                        alphaEvents = [
                            Chart_Objects_Rpe.LineEvent(
                                startTime = Chart_Objects_Rpe.Beat(
                                    *LineEvent_item.get("startTime", [0, 0, 1])
                                ),
                                endTime = Chart_Objects_Rpe.Beat(
                                    *LineEvent_item.get("endTime", [0, 0, 1])
                                ),
                                start = LineEvent_item.get("start", 0.0),
                                end = LineEvent_item.get("end", 0.0),
                                easingType = LineEvent_item.get("easingType", 1)
                            ) for LineEvent_item in EventLayer_item.get("alphaEvents", [])
                        ] if EventLayer_item.get("alphaEvents", []) is not None else []
                    ) if EventLayer_item is not None else Chart_Objects_Rpe.EventLayer(speedEvents = [], moveXEvents = [], moveYEvents = [], rotateEvents = [], alphaEvents = [])
                    for EventLayer_item in judgeLine_item.get("eventLayers", [])
                ],
                extended = Chart_Objects_Rpe.Extended(
                    scaleXEvents = [
                        Chart_Objects_Rpe.LineEvent(
                            startTime = Chart_Objects_Rpe.Beat(
                                *LineEvent_item.get("startTime", [0, 0, 1])
                            ),
                            endTime = Chart_Objects_Rpe.Beat(
                                *LineEvent_item.get("endTime", [0, 0, 1])
                            ),
                            start = LineEvent_item.get("start", 1.0),
                            end = LineEvent_item.get("end", 1.0),
                            easingType = LineEvent_item.get("easingType", 1)
                        ) for LineEvent_item in judgeLine_item.get("extended", {}).get("scaleXEvents", [])
                    ] if judgeLine_item.get("extended", {}).get("scaleXEvents", []) is not None else [],
                    scaleYEvents = [
                        Chart_Objects_Rpe.LineEvent(
                            startTime = Chart_Objects_Rpe.Beat(
                                *LineEvent_item.get("startTime", [0, 0, 1])
                            ),
                            endTime = Chart_Objects_Rpe.Beat(
                                *LineEvent_item.get("endTime", [0, 0, 1])
                            ),
                            start = LineEvent_item.get("start", 1.0),
                            end = LineEvent_item.get("end", 1.0),
                            easingType = LineEvent_item.get("easingType", 1)
                        ) for LineEvent_item in judgeLine_item.get("extended", {}).get("scaleYEvents", [])
                    ] if judgeLine_item.get("extended", {}).get("scaleYEvents", []) is not None else [],
                    colorEvents = [
                        Chart_Objects_Rpe.LineEvent(
                            startTime = Chart_Objects_Rpe.Beat(
                                *LineEvent_item.get("startTime", [0, 0, 1])
                            ),
                            endTime = Chart_Objects_Rpe.Beat(
                                *LineEvent_item.get("endTime", [0, 0, 1])
                            ),
                            start = LineEvent_item.get("start", [255, 255, 255]),
                            end = LineEvent_item.get("end", [255, 255, 255]),
                            easingType = LineEvent_item.get("easingType", 1)
                        ) for LineEvent_item in judgeLine_item.get("extended", {}).get("colorEvents", [])
                    ] if judgeLine_item.get("extended", {}).get("colorEvents", []) is not None else [],
                    textEvents = [
                        Chart_Objects_Rpe.LineEvent(
                            startTime = Chart_Objects_Rpe.Beat(
                                *LineEvent_item.get("startTime", [0, 0, 1])
                            ),
                            endTime = Chart_Objects_Rpe.Beat(
                                *LineEvent_item.get("endTime", [0, 0, 1])
                            ),
                            start = LineEvent_item.get("start", ""),
                            end = LineEvent_item.get("end", ""),
                            easingType = LineEvent_item.get("easingType", 1)
                        ) for LineEvent_item in judgeLine_item.get("extended", {}).get("textEvents", [])
                    ] if judgeLine_item.get("extended", {}).get("textEvents", []) is not None else [],
                ) if judgeLine_item.get("extended", {}) is not None else None,
                notes = [
                    Chart_Objects_Rpe.Note(
                        type = Note_item.get("type", 1),
                        startTime = Chart_Objects_Rpe.Beat(
                            *Note_item.get("startTime", [0, 0, 1])
                        ),
                        endTime = Chart_Objects_Rpe.Beat(
                            *Note_item.get("endTime", [0, 0, 1])
                        ),
                        positionX = Note_item.get("positionX", 0),
                        above = Note_item.get("above", 1),
                        isFake = Note_item.get("isFake", False),
                        speed = Note_item.get("speed", 1.0),
                        yOffset = Note_item.get("yOffset", 0.0),
                        visibleTime = Note_item.get("visibleTime", 999999.0),
                        width = Note_item.get("size", 1.0),
                        alpha = Note_item.get("alpha", 255),
                    )
                    for Note_item in judgeLine_item.get("notes", [])
                ]
            )
            for judgeLine_item in chart.get("judgeLineList", [])
        ]
    )

    return rpe_chart_obj

result = load({}) # 这里传入你的谱面
- 最后调用
result.JudgeLineList[i].GetState, 并传入当前拍数为t和判定线默认颜色为defaultColor, 和谱面对象master即可获取当前拍数下的判定线全部状态
beat
beat 是RPE所有事件的时间单位,它是一个 int[3] ,在RPE中显示为 [0]:[1]/[2]。
单BPM计算方式为:
double beat = RPEBeat[1] / RPEBeat[2] + RPEBeat[0];
double seconds = 60 / BPM * beat;
多BPM计算方式见 Python 示例。
Python 示例
- 若
self.BPMList为一个list[BPMEvent] BPMEvent定义:
@dataclass
class BPMEvent:
    startTime: Beat
    bpm: float
sec2beat中t为秒数,bpmfactor为判定线中的bpmfactor字段`beat2sec中t为拍数,bpmfactor为判定线中的bpmfactor字段`- 且
beat2sec(sec2beat(x)) == x与sec2beat(beat2sec(x)) == x的结果均为True - 则有:
def sec2beat(self, t: float, bpmfactor: float):
    beat = 0.0
    for i, e in enumerate(self.BPMList):
        bpmv = e.bpm / bpmfactor
        if i != len(self.BPMList) - 1:
            et_beat = self.BPMList[i + 1].startTime.value - e.startTime.value
            et_sec = et_beat * (60 / bpmv)

            if t >= et_sec:
                beat += et_beat
                t -= et_sec
            else:
                beat += t / (60 / bpmv)
                break
        else:
            beat += t / (60 / bpmv)
    return beat

def beat2sec(self, t: float, bpmfactor: float):
    sec = 0.0
    for i, e in enumerate(self.BPMList):
        bpmv = e.bpm / bpmfactor
        if i != len(self.BPMList) - 1:
            et_beat = self.BPMList[i + 1].startTime.value - e.startTime.value

            if t >= et_beat:
                sec += et_beat * (60 / bpmv)
                t -= et_beat
            else:
                sec += t * (60 / bpmv)
                break
        else:
            sec += t * (60 / bpmv)
    return sec
Note
note,即音符,是谱面的主要构成之一,每个note都应该含有以下参数:
| 字段 | 类型 | 描述 | 默认值 | 加入版本 |
|---|---|---|---|---|
| above | int | 1 为从线的正面下落,其他数字为从线的背面下落 | 1 | - |
| alpha | int | note不透明度,0为完全透明,255为完全不透明 | 255 | - |
| endTime | beat | note结束时间,若 type 为 2 ,此值为Hold的结束时间,否则与startTime一致 | - | - |
| startTime | beat | note开始时间,若 type 为 2 ,此值为Hold的开始时间,否则与endTime一致 | - | - |
| isFake | int | note真值,1为假,其他数为真 | 0 | - |
| positionX | float | note相对于判定线中心点的X坐标 | - | - |
| size | float | note大小倍率 | 1.0 | - |
| speed | float | 流速倍率 | 1.0 | - |
| type | int | note类型,详见对照表 | - | - |
| visibleTime | float | note可见时间,单位为秒 | 999999.0000 | - |
| yOffset | float | note的Y轴偏移,正数向上偏移,负数向下偏移,同时偏移打击特效的位置 | 0 | - |
| hitsound | string? | note自定义打击音文件相对于谱面文件根目录路径 | - | 142 |
| judgeArea | float | 判定区域宽度倍率 | 1.0 | 170 |
| tint或color | int[3] | note颜色,格式为[R, G, B],范围为0-255 | [255, 255, 255] | 170 |
| tintHitEffects | int[3]? | note打击特效颜色,格式为[R, G, B],范围为0-255 | [255, 255, 255] | 170 |
size字段实际上在RPE中显示为宽度,即只能控制音符的宽度而不是音符的整个大小。above字段在RPE中,Hold如果从背面下落默认被设置为2,其他Note均为0,但是为1一定是从正面下落!hitsound字段在没有自定义音效时不存在。- 假note没有判定,没有打击特效与音效,不计分,不计物量,若为
Hold则始终显示为未打击样式。 color字段用于给note染色,染色方式为顶点颜色乘法,即noteColor = noteColor * color。- color字段修改过字段名称,由于color版本被公测,后续版本更换为tint,所以这两个字段可能都有被使用,定义不变,请注意兼容。
tintHitEffects字段用于给note的打击特效染色,当此字段出现时,无论判定是Good还是Perfect,打击特效均使用此颜色(使用原始材质进行顶点颜色算法),不需要额外计算。
Note类型对照
| 字段值 | 描述 |
|---|---|
| 1 | Tap |
| 2 | Hold |
| 3 | Flick |
| 4 | Drag |
| Default | Tap |
Event
本页将介绍判定线事件层级下的普通事件。
如果你想了解特殊事件,请查阅特殊事件。
- RPE中,一共有五种普通事件,它们分别是:
moveXEvents(X轴移动事件)、moveYEvents(Y轴移动事件)、rotateEvents(旋转事件)、alphaEvents(不透明度事件)、speedEvents(音符流速事件)。 - 在层级下,这些字段都对应一个
JsonArray,每一个元素代表一个事件。 - 当前判定线无某一个事件时,无对应字段而非空数组。
除了流速事件外的每个普通事件都应该含有以下字段。
| 字段名 | 类型 | 描述 | 默认值 | 加入版本 |
|---|---|---|---|---|
| bezier | int | 缓动是否为贝塞尔曲线,0 为不是,1 为是 | 0 | - |
| bezierPoints | float[4] | 贝塞尔曲线控制点,当bezier为1时生效,详见百度百科 | [ 0.0, 0.0, 0.0, 0.0 ] | - |
| easingLeft | float | 缓动的左边界位置,最小为 0.0,最大为 1.0 | 0.0 | - |
| easingRight | float | 缓动的右边界位置,最小为 0.0,最大为 1.0 | 1.0 | - |
| easingType | int | 缓动类型,详见extend | 1 | - |
| linkgroup | int | - | - | - |
| start | float | 事件开始时数值 | - | - |
| startTime | beat | 事件开始的时间 | - | - |
| end | float | 事件结束时数值 | - | - |
| endTime | beat | 事件结束的时间 | - | - |
- 坐标系锚点位于屏幕中心,X轴范围为
-675 ~ 675,Y轴范围为-450 ~ 450。 Alpha不透明度`事件的正常范围为0 ~ 255,0为完全透明,255`为完全不透明。- 若
Alpha事件数值为负数,则会在隐藏判定线的同时隐藏这条判定线上的所有Note。(根据作者(cmdysj)所述,此功能是废弃的非法功能,但它仍然有效)
- 若
速度事件只有上述的startTime、endTime、start、end、linkgroup字段。- 速度事件在
162版本支持了所有缓动字段,但是仍然不支持贝塞尔曲线缓动(没有上述的bezier、bezierPoints字段)。 RPE作者原文:速度事件缓动不为1时,实际的速度变化与缓动的导函数形状相同,从而floorposition的变化遵循缓动曲线。为了兼容性,缓动为1时我们保持原含义不变,也即缓动为1和缓动为5都代表二次型的floorposition变化- RPE 1.7.0版本,速度事件缓动回归最原始的逻辑,使用缓动函数缓动速度的数值,效果有待考证。
音符流速事件不支持缓动,即只有线性变化。- 流速为负数时,音符会向上飞,若音符为
Hold,在Hold尾出现时,整个音符都会出现(即使Hold还没完全回到判定线正面)。(此行为与本家行为不符,请酌情选择)
- 速度事件在
Python 示例 (不支持bezier):
- 定义
rpe_easing.py(略) - 定义
Beat:
@dataclass
class Beat:
    var1: int
    var2: int
    var3: int

    def __post_init__(self):
        self.value = self.var1 + (self.var2 / self.var3)
        self._hash = hash(self.value)

    def __hash__(self) -> int:
        return self._hash
- 定义
LineEvent
@dataclass
class LineEvent:
    startTime: Beat
    endTime: Beat
    start: float|str|list[int]
    end: float|str|list[int]
    easingType: int
    easingFunc: typing.Callable[[float], float] = rpe_easing.ease_funcs[0]

    def __post_init__(self):
        if not isinstance(self.easingType, int): self.easingType = 1
        self.easingType = 1 if self.easingType < 1 else (len(rpe_easing.ease_funcs) if self.easingType > len(rpe_easing.ease_funcs) else self.easingType)
        self.easingFunc = rpe_easing.ease_funcs[self.easingType - 1]
- 定义
easing_interpolation
def easing_interpolation(
    t: float, st: float,
    et: float, sv: float,
    ev: float, f: typing.Callable[[float], float]
):
    if t == st: return sv
    return f((t - st) / (et - st)) * (ev - sv) + sv
default为事件默认值- 则有:
def GetEventValue(t: float, es: list[LineEvent], default):
    for e in es:
        if e.startTime.value <= t <= e.endTime.value:
            if isinstance(e.start, float|int):
                return easing_interpolation(t, e.startTime.value, e.endTime.value, e.start, e.end, e.easingFunc)
            elif isinstance(e.start, str):
                return e.start
            elif isinstance(e.start, list):
                r = easing_interpolation(t, e.startTime.value, e.endTime.value, e.start[0], e.end[0], e.easingFunc)
                g = easing_interpolation(t, e.startTime.value, e.endTime.value, e.start[1], e.end[1], e.easingFunc)
                b = easing_interpolation(t, e.startTime.value, e.endTime.value, e.start[2], e.end[2], e.easingFunc)
                return (r, g, b)
    return default
特殊事件
本页讲解RPE的特殊事件,俗称故事板,位于事件编辑的第五个层级。
每一个事件字段都对应一个 JsonArray,每一个元素对应一个事件。
除了 inclineEvents(倾斜事件),其他事件在没有使用时都没有对应字段
colorEvents
颜色事件,可以控制判定线或纹理的颜色,它包含以下字段:
| 字段名 | 类型 | 描述 | 默认值 | 加入版本 |
|---|---|---|---|---|
| bezier | int | 缓动是否为贝塞尔曲线,0 为不是,1 为是 | 0 | - |
| bezierPoints | float[4] | 贝塞尔曲线控制点,当bezier为1时生效,详见百度百科 | [ 0.0, 0.0, 0.0, 0.0 ] | - |
| easingLeft | float | 缓动的左边界位置,最小为 0.0,最大为 1.0 | 0.0 | - |
| easingRight | float | 缓动的右边界位置,最小为 0.0,最大为 1.0 | 1.0 | - |
| easingType | int | 缓动类型,详见extend | 1 | - |
| linkgroup | int | - | - | - |
| start | int[3] | 事件开始时颜色,三个值分别对应 RGB;最大为 255,最小为 0 | - | - |
| startTime | beat | 事件开始的时间 | - | - |
| end | int[3] | 事件结束时颜色,三个值分别对应 RGB;最大为 255,最小为 0 | - | - |
| endTime | beat | 事件结束的时间 | - | - |
scaleXEvents
X轴缩放事件,可以控制判定线、纹理或文字的宽度缩放,它包含以下字段:
| 字段名 | 类型 | 描述 | 默认值 | 加入版本 |
|---|---|---|---|---|
| bezier | int | 缓动是否为贝塞尔曲线,0 为不是,1 为是 | 0 | - |
| bezierPoints | float[4] | 贝塞尔曲线控制点,当bezier为1时生效,详见百度百科 | [ 0.0, 0.0, 0.0, 0.0 ] | - |
| easingLeft | float | 缓动的左边界位置,最小为 0.0,最大为 1.0 | 0.0 | - |
| easingRight | float | 缓动的右边界位置,最小为 0.0,最大为 1.0 | 1.0 | - |
| easingType | int | 缓动类型,详见extend | 1 | - |
| linkgroup | int | - | - | - |
| start | float | 事件开始时缩放 | 1 | - |
| startTime | beat | 事件开始的时间 | - | - |
| end | float | 事件结束时缩放 | 1 | - |
| endTime | beat | 事件结束的时间 | - | - |
scaleYEvents
Y轴缩放事件,可以控制判定线、纹理或文字的高度缩放,它包含以下字段:
| 字段名 | 类型 | 描述 | 默认值 | 加入版本 |
|---|---|---|---|---|
| bezier | int | 缓动是否为贝塞尔曲线,0 为不是,1 为是 | 0 | - |
| bezierPoints | float[4] | 贝塞尔曲线控制点,当bezier为1时生效,详见百度百科 | [ 0.0, 0.0, 0.0, 0.0 ] | - |
| easingLeft | float | 缓动的左边界位置,最小为 0.0,最大为 1.0 | 0.0 | - |
| easingRight | float | 缓动的右边界位置,最小为 0.0,最大为 1.0 | 1.0 | - |
| easingType | int | 缓动类型,详见extend | 1 | - |
| linkgroup | int | - | - | - |
| start | float | 事件开始时缩放 | 1 | - |
| startTime | beat | 事件开始的时间 | - | - |
| end | float | 事件结束时缩放 | 1 | - |
| endTime | beat | 事件结束的时间 | - | - |
textEvents
文字事件,可以控制文字的显示,它包含以下字段:
| 字段名 | 类型 | 描述 | 默认值 | 加入版本 |
|---|---|---|---|---|
| bezier | int | 缓动是否为贝塞尔曲线,0 为不是,1 为是 | 0 | - |
| bezierPoints | float[4] | 贝塞尔曲线控制点,当bezier为1时生效,详见百度百科 | [ 0.0, 0.0, 0.0, 0.0 ] | - |
| easingLeft | float | 缓动的左边界位置,最小为 0.0,最大为 1.0 | 0.0 | - |
| easingRight | float | 缓动的右边界位置,最小为 0.0,最大为 1.0 | 1.0 | - |
| easingType | int | 缓动类型,详见extend | 1 | - |
| linkgroup | int | - | - | - |
| start | string | 事件开始时字符 | - | - |
| startTime | beat | 事件开始的时间 | - | - |
| end | string | 事件结束时字符 | - | - |
| endTime | beat | 事件结束的时间 | - | - |
| font | string | 文字字体(本字段需看下方解释) | 请看下方解释 | - |
- 从
152版本开始,font字段在为cmdysj默认字体时不会有本字段,只有有自定义字体时才会存在本字段。 - 在
152版本之前,font字段默认存在且默认为cmdysj。
此事件设置缓动可能不会有效,也可能会出现未定义的错误导致模拟器崩溃,详见issue。
- 文字事件的文字中含有
%P%时,可以让文本中的数字在事件播放过程中根据缓动动态变化。 - 有文字事件的判定线会始终隐藏,只显示文字(即使播放的地方没有文字事件),也会清除自定义纹理。
- 有文字事件但是没有颜色事件时,文字的颜色会始终为白色。
- 从
153版本开始,文字事件中的文字可以包含\n换行符且有效(其他的不可用)。
paintEvents
画笔事件,此事件在 143 版本被 shader 编辑功能取代,故无法编辑。包含以下字段:
| 字段名 | 类型 | 描述 | 默认值 | 加入版本 | 移除版本 |
|---|---|---|---|---|---|
| bezier | int | 缓动是否为贝塞尔曲线,0 为不是,1 为是 | 0 | - | 143 |
| bezierPoints | float[4] | 贝塞尔曲线控制点,当bezier为1时生效,详见百度百科 | [ 0.0, 0.0, 0.0, 0.0 ] | - | 143 |
| easingLeft | float | 缓动的左边界位置,最小为 0.0,最大为 1.0 | 0.0 | - | 143 |
| easingRight | float | 缓动的右边界位置,最小为 0.0,最大为 1.0 | 1.0 | - | 143 |
| easingType | int | 缓动类型,详见extend | 1 | - | 143 |
| linkgroup | int | - | - | - | 143 |
| start | string | 事件开始时画笔大小 | 0 | - | 143 |
| startTime | beat | 事件开始的时间 | - | - | 143 |
| end | string | 事件结束时画笔大小 | 0 | - | 143 |
| endTime | beat | 事件结束的时间 | - | - | 143 |
- 其它行为待补充
gifEvents
GIF播放进度事件,此事件在 150 版本与GIF判定线纹理一同加入,用于控制GIF的播放进度。
| 字段名 | 类型 | 描述 | 默认值 | 加入版本 |
|---|---|---|---|---|
| easingType | int | 缓动类型,详见extend | 1 | - |
| linkgroup | int | - | - | - |
| start | float | 事件开始时GIF的播放进度 | - | - |
| startTime | beat | 事件开始的时间 | - | - |
| end | float | 事件结束时GIF的播放进度 | - | - |
| endTime | beat | 事件结束的时间 | - | - |
- 若判定线纹理是GIF但是没有
gifEvents时,GIF会自动循环播放。 - GIF的第一帧为
0.0,最后一帧为1.0,若播放进度超出此范围,GIF将会自动循环播放。 - 若当前播放进度没有
gifEvents时,GIF会自动循环播放。 - 文字事件同样会将此纹理清除。
- 超过
15MB大小的GIF会使RPE在加载谱面时弹出解码失败。 - 纹理为GIF以后,流速事件会被替换为此事件的编辑,所以理论上此事件不可能与流速事件同时出现。
- 位于其他层级的
gifEvents会被忽略,且RPE纠错会标红。
inclineEvents
倾斜事件,疑似已被弃用,但是默认会在 extended 字段下留一个垫底事件。
此事件无法在RPE中编辑。
- 倾斜事件开始结束数值为判定线Z轴倾斜角度.
- 具体行为需要补充。
扩展参数
attachUI
attachUI 是RPE独有特性,它允许你使用判定线绑定UI元素,使你可以控制UI的位置,透明度,大小等。
属性对应UI元素列表:
| 值 | 对应UI元素 | RPE设置中对应数字 | 锚点 | 注 |
|---|---|---|---|---|
| pause | 暂停按钮 | 1 | 左上角 | - |
| combonumber | 连击数 | 2 | 中心 | 绑定此UI会使此UI透明度受到Alpha事件影响,默认连击大于等于 3 时才会显示 |
| combo | 连击数下的 combo 文字 | 3 | 中心 | 同上 |
| score | 分数 | 4 | 右上角 | - |
| bar | 进度条 | 5 | 左侧中心 | RPE 1.4.0 及以前,此属性绑定的为曲名左侧的白色竖条 |
| name | 谱面名称 | 6 | 左下角 | - |
| level | 谱面等级 | 7 | 右下角 | - |
- 在UI被绑定后,判定线将会自动隐藏,UI可以通过类似于子线的方式进行操作,不同的是可以操作UI角度和透明度;判定线实际位置仍然不变。
anchor
anchor 是RPE独有特性,它允许你设置判定线的锚点,它的设计是为文字事件服务的。
- 在RPE中,此设置在顶栏工具栏第二页中,两个数值用空格分割。
- 它是一个
float[2],两个值对应材质的x和y坐标。 x默认为0.5,即中心,1时判定线纹理向左移,0时判定线纹理向右移。y默认为0.5,即中心,1时判定线纹理向下移,0时判定线纹理向上移。- 此字段同样可以影响自定义纹理的位置
Texture
RPE允许设置判定线的 Texture 字段来修改判定线的纹理,当判定线的纹理被修改后,判定线颜色不再受到AP/FC判定线颜色指示影响。
- 若不使用scaleXEvents和scaleYEvents,修改判定线纹理大小,则默认缩放为
1。 - 若纹理为一个GIF动图,则会受到gifEvents的影响。(
150版本开始支持)
easingType
easingType 是RPE用于对应缓动的数字标识,对照表如下:
| 值 | 对应缓动 | 注 |
|---|---|---|
| 1 | Linear | - |
| 2 | Out Sine | - |
| 3 | In Sine | - |
| 4 | Out Quad | - |
| 5 | In Quad | - |
| 6 | In Out Sine | - |
| 7 | In Out Quad | - |
| 8 | Out Cubic | - |
| 9 | In Cubic | - |
| 10 | Out Quart | - |
| 11 | In Quart | - |
| 12 | In Out Cubic | - |
| 13 | In Out Quart | - |
| 14 | Out Quint | - |
| 15 | In Quint | - |
| 16 | Out Expo | - |
| 17 | In Expo | - |
| 18 | Out Circ | - |
| 19 | In Circ | - |
| 20 | Out Back | - |
| 21 | In Back | - |
| 22 | In Out Circ | - |
| 23 | In Out Back | - |
| 24 | Out Elastic | - |
| 25 | In Elastic | - |
| 26 | Out Bounce | - |
| 27 | In Bounce | - |
| 28 | In Out Bounce | - |
| 29 | In Out Elastic | 无法在速度事件使用 |
- RPE 1.7.0版本恢复了29号缓动的使用。
你可以在这个网站查看它们的函数等信息。
Python 缓动示例
import math
import typing

ease_funcs:list[typing.Callable[[float], float]] = [
  lambda t: t, # linear - 1
  lambda t: math.sin((t * math.pi) / 2), # out sine - 2
  lambda t: 1 - math.cos((t * math.pi) / 2), # in sine - 3
  lambda t: 1 - (1 - t) * (1 - t), # out quad - 4
  lambda t: t ** 2, # in quad - 5
  lambda t: -(math.cos(math.pi * t) - 1) / 2, # io sine - 6
  lambda t: 2 * (t ** 2) if t < 0.5 else 1 - (-2 * t + 2) ** 2 / 2, # io quad - 7
  lambda t: 1 - (1 - t) ** 3, # out cubic - 8
  lambda t: t ** 3, # in cubic - 9
  lambda t: 1 - (1 - t) ** 4, # out quart - 10
  lambda t: t ** 4, # in quart - 11
  lambda t: 4 * (t ** 3) if t < 0.5 else 1 - (-2 * t + 2) ** 3 / 2, # io cubic - 12
  lambda t: 8 * (t ** 4) if t < 0.5 else 1 - (-2 * t + 2) ** 4 / 2, # io quart - 13
  lambda t: 1 - (1 - t) ** 5, # out quint - 14
  lambda t: t ** 5, # in quint - 15
  lambda t: 1 if t == 1 else 1 - 2 ** (-10 * t), # out expo - 16
  lambda t: 0 if t == 0 else 2 ** (10 * t - 10), # in expo - 17
  lambda t: (1 - (t - 1) ** 2) ** 0.5, # out circ - 18
  lambda t: 1 - (1 - t ** 2) ** 0.5, # in circ - 19
  lambda t: 1 + 2.70158 * ((t - 1) ** 3) + 1.70158 * ((t - 1) ** 2), # out back - 20
  lambda t: 2.70158 * (t ** 3) - 1.70158 * (t ** 2), # in back - 21
  lambda t: (1 - (1 - (2 * t) ** 2) ** 0.5) / 2 if t < 0.5 else (((1 - (-2 * t + 2) ** 2) ** 0.5) + 1) / 2, # io circ - 22
  lambda t: ((2 * t) ** 2 * ((2.5949095 + 1) * 2 * t - 2.5949095)) / 2 if t < 0.5 else ((2 * t - 2) ** 2 * ((2.5949095 + 1) * (t * 2 - 2) + 2.5949095) + 2) / 2, # io back - 23
  lambda t: 0 if t == 0 else (1 if t == 1 else 2 ** (-10 * t) * math.sin((t * 10 - 0.75) * (2 * math.pi / 3)) + 1), # out elastic - 24
  lambda t: 0 if t == 0 else (1 if t == 1 else - 2 ** (10 * t - 10) * math.sin((t * 10 - 10.75) * (2 * math.pi / 3))), # in elastic - 25
  lambda t: 7.5625 * (t ** 2) if (t < 1 / 2.75) else (7.5625 * (t - (1.5 / 2.75)) * (t - (1.5 / 2.75)) + 0.75 if (t < 2 / 2.75) else (7.5625 * (t - (2.25 / 2.75)) * (t - (2.25 / 2.75)) + 0.9375 if (t < 2.5 / 2.75) else (7.5625 * (t - (2.625 / 2.75)) * (t - (2.625 / 2.75)) + 0.984375))), # out bounce - 26
  lambda t: 1 - (7.5625 * ((1 - t) ** 2) if ((1 - t) < 1 / 2.75) else (7.5625 * ((1 - t) - (1.5 / 2.75)) * ((1 - t) - (1.5 / 2.75)) + 0.75 if ((1 - t) < 2 / 2.75) else (7.5625 * ((1 - t) - (2.25 / 2.75)) * ((1 - t) - (2.25 / 2.75)) + 0.9375 if ((1 - t) < 2.5 / 2.75) else (7.5625 * ((1 - t) - (2.625 / 2.75)) * ((1 - t) - (2.625 / 2.75)) + 0.984375)))), # in bounce - 27
  lambda t: (1 - (7.5625 * ((1 - 2 * t) ** 2) if ((1 - 2 * t) < 1 / 2.75) else (7.5625 * ((1 - 2 * t) - (1.5 / 2.75)) * ((1 - 2 * t) - (1.5 / 2.75)) + 0.75 if ((1 - 2 * t) < 2 / 2.75) else (7.5625 * ((1 - 2 * t) - (2.25 / 2.75)) * ((1 - 2 * t) - (2.25 / 2.75)) + 0.9375 if ((1 - 2 * t) < 2.5 / 2.75) else (7.5625 * ((1 - 2 * t) - (2.625 / 2.75)) * ((1 - 2 * t) - (2.625 / 2.75)) + 0.984375))))) / 2 if t < 0.5 else (1 +(7.5625 * ((2 * t - 1) ** 2) if ((2 * t - 1) < 1 / 2.75) else (7.5625 * ((2 * t - 1) - (1.5 / 2.75)) * ((2 * t - 1) - (1.5 / 2.75)) + 0.75 if ((2 * t - 1) < 2 / 2.75) else (7.5625 * ((2 * t - 1) - (2.25 / 2.75)) * ((2 * t - 1) - (2.25 / 2.75)) + 0.9375 if ((2 * t - 1) < 2.5 / 2.75) else (7.5625 * ((2 * t - 1) - (2.625 / 2.75)) * ((2 * t - 1) - (2.625 / 2.75)) + 0.984375))))) / 2, # io bounce - 28
  lambda t: 0 if t == 0 else (1 if t == 0 else (-2 ** (20 * t - 10) * math.sin((20 * t - 11.125) * ((2 * math.pi) / 4.5))) / 2 if t < 0.5 else (2 ** (-20 * t + 10) * math.sin((20 * t - 11.125) * ((2 * math.pi) / 4.5))) / 2 + 1) # io elastic - 29
]
Controls
control是以关键帧形式控制note各项参数的一个rpe特性。
Alpha Control
| 字段名 | 类型 | 描述 | 默认值 | 加入版本 |
|---|---|---|---|---|
| easing | int | 到下一个关键帧数值的缓动类型,详见对照表 | ||
| alpha | float | note不透明度 | 1.0 | - |
| x | float | note与判定线的纵向距离 |
alpha control可以控制 note 的不透明度。- 可以与note的
alpha字段结合使用,不冲突,混合公式为noteAlpha = noteAlpha * nowAlpha(先从0~255转换为0~1后再计算)。
行为
- 当
alpha control如下所示时:
{
  "alphaControl": [
    {
      "alpha": 1.0,
      "easing": 1,
      "x": 0.0
    },
    {
      "alpha": 0.5,
      "easing": 2,
      "x": 100.0
    },
    {
      "alpha": 1.0,
      "easing": 1,
      "x": 9999999.0
    }
  ]
}
- note 在距离判定线
100个y坐标单位前不透明度为0.5,在100个y坐标单位后以Out Sine缓动函数缓动到1.0不透明度到与判定线重合。
Size Control
| 字段名 | 类型 | 描述 | 默认值 | 加入版本 |
|---|---|---|---|---|
| easing | int | 到下一个关键帧数值的缓动类型,详见对照表 | 1 | - |
| size | float | note大小倍率 | 1.0 | - |
| x | float | note与判定线的纵向距离 | - | - |
size control可以真正的控制 note 的大小,而不是仅仅控制宽度。- 可以与note的宽度字段结合使用,不冲突。
- 无法影响
Hold类型的note大小。
行为
- 当
size control如下所示时:
{
  "sizeControl": [
    {
      "easing": 1,
      "size": 1.0,
      "x": 0.0
    },
    {
      "easing": 2,
      "size": 1.5,
      "x": 200.0
    },
    {
      "easing": 1,
      "size": 1.0,
      "x": 9999999.0
    }
  ]
}
- note 在距离判定线
200个y坐标前大小为原先的1.5倍,在200个y坐标单位后以Out Sine缓动函数缓动到1.0倍大小到与判定线重合。
pos Control(X Control)
| 字段名 | 类型 | 描述 | 默认值 | 加入版本 |
|---|---|---|---|---|
| easing | int | 到下一个关键帧数值的缓动类型,详见对照表 | 1 | - |
| pos | float | note的positionX参数倍率 | - | - |
| x | float | note与判定线的纵向距离 | - | - |
pos control可以动态控制 note 的positionX倍率。
行为
- 当
pos control如下所示时:
{
  "posControl": [
    {
      "easing": 1,
      "pos": 2.0,
      "x": 0.0
    },
    {
      "easing": 2,
      "pos": 1.0,
      "x": 100.0
    },
    {
      "easing": 1,
      "pos": 1.0,
      "x": 9999999.0
    }
  ]
}
- note 在距离判定线
100个y坐标单位前note的positionX为原先的2.0倍,在100个y坐标单位后以Out Sine缓动函数缓动note的positionX为1.0倍到与判定线重合。
y Control
| 字段名 | 类型 | 描述 | 默认值 | 加入版本 |
|---|---|---|---|---|
| easing | int | 到下一个关键帧数值的缓动类型,详见对照表 | 1 | - |
| y | float | (待补充) | - | |
| x | float | note与判定线的纵向距离 | - |
- 行为描述待补充
Skew Control
| 字段名 | 类型 | 描述 | 默认值 | 加入版本 |
|---|---|---|---|---|
| easing | int | 到下一个关键帧数值的缓动类型,详见对照表 | 1 | - |
| skew | float | (待补充) | - | - |
| x | float | note与判定线的纵向距离 | - | - |
- 对
Hold类型的note无效。 - 行为描述待补充
PE 文档
PEC(PhiEditor Chart)是一种纯文本谱面格式,它不使用json等常见格式存储,需要手动编写序列化/反序列化代码。
本文档只介绍PEC格式构造,不保证行为的准确性,此格式已停止更新。
基本信息
本页描述一些谱面的基本信息,要注意的是,PEC不保存谱面的元信息(如曲名、谱师等信息),这些信息需要从其他地方获取。
PEC最大只能有30条判定线,PhiEditor不允许创建更多判定线。
PhiEditor不支持XY分离。
坐标系
屏幕中心为0,0点;
左下角X坐标为-1024,Y坐标为-700;
右上角X坐标为1024,Y坐标为700。
谱面偏移
PEC第一行为谱面的 offset,单位为毫秒,是一个整数。
BPM列表
PEC中,起始为 bp 的行为 BPM 列表行,示例如下:
bp 0.000 180.000
表示在 0.000 拍处,BPM为 180.000。
事件经过
事件是谱面的主要构造之一,有瞬时与缓动两种大类事件。
瞬时事件
- 瞬时事件会在所属拍将判定线的对应数值立即设定为该事件的值,格式如下:
cv 0 0.000 10.000
cv 所属判定线号 所属拍 值

cp 0 0.000 1024.000 700.000
cp 所属判定线号 所属拍 X坐标 Y坐标

cd 0 0.000 0.000
cd 所属判定线号 所属拍 旋转角度

ca 0 0.000 0
ca 所属判定线号 所属拍 不透明度
cv为速度事件瞬时事件,要注意的是,速度事件不支持缓动。cp为移动事件瞬时事件。cd为旋转事件瞬时事件,需要注意的是,制谱器会将在制谱界面输入的角度取反后存入谱面文件中,原因未知。ca为不透明度事件瞬时事件。
缓动事件
- 缓动事件会在开始时间时,将判定线当前数值作为起始数值,使用指定缓动函数缓动到终点数值。
cm 0 1.000 2.000 2048.000 700.000 1
cm 所属判定线号 起始拍 结束拍 终点X坐标 终点Y坐标 缓动类型

cr 0 1.000 2.000 0.000 1
cr 所属判定线号 起始拍 结束拍 终点旋转角度 缓动类型

cf 0 1.000 2.000 255
cf 所属判定线号 起始拍 结束拍 终点不透明度
- 缓动类型编号对照与
RPE一致,请参考对照表。 cm为移动事件缓动事件。cr为旋转事件缓动事件。cf为不透明度事件缓动事件,不支持缓动类型,变化始终线性。
其它说明
- 速度值为一个
float,默认为10.000 - 透明度值为一个
int。0为完全透明,255为完全不透明,-1时隐藏判定线上所有音符。- 仍有其它特性未考证。
音符
音符是谱面的主要构造之一,示例如下:
n1 0 0.500 -40.000 1 0
# 1.00
& 1.00

n2 0 0.250 2.000 -320.000 1 0
# 1.00
& 1.00
字段说明
n开头行为音符行,n后面的数字代表音符类型,对照如下:
| 字段值 | 描述 |
|---|---|
| 1 | Tap |
| 2 | Hold |
| 3 | Flick |
| 4 | Drag |
- 除了
n2外,格式如下:
n类型 所属判定线 打击拍 X坐标 是否从下方下落 是否为假note
# 速度倍率
& 宽度倍率
n2(Hold)格式如下:
n2 所属判定线 开始拍 结束拍 X坐标 是否从下方下落 是否为假note
# 速度倍率
& 宽度倍率
是否从下方下落属性为2时从下方下落,为1时从上方下落。是否为假note属性为1时为假note。
Phigros Official 谱面文档
Phigros Official谱面根目录结构
- 目前
Phigros Official谱面的数据计算与渲染已经十分成熟 - 所有的时间单位均为
128分音符即60 / 32 / bpm, 下文简写为1.875 / bpm
谱面根目录结构
formatVersion
formatVersion是一个int- 该项影响谱面判定线移动事件的解析方式
- 该值可能 为
1,3或其他
offset
offset是一个float- 该项为谱面的延迟, 单位为秒
- 为正数时, 谱面比音乐快, 为负数时, 谱面比音乐慢
judgeLineList
judgeLineList是一个JsonArray,包含若干个JsonObject,每个JsonObject代表一个判定线。
Note
note,即音符,是谱面的主要构成之一,每个note都应该含有以下参数:
| 字段名 | 类型 | 描述 | 单位 |
|---|---|---|---|
| type | int | note的类型 | - |
| time | int | note的时间 | 1.875 / bpm |
| holdTime | float | hold的持续时间 (仅hold, 其他为0.0) | 1.875 / bpm |
| positionX | float | note的横向坐标 | 宽度单位 |
| speed | float | 对于非hold: note的速度倍率 对于hold: hold尾的速度, hold头速度倍率恒为1 | - |
| floorPosition | float | note判定时距离判定线的高度 (仅方便计算) | 高度单位 |
Event
本页将介绍判定线事件下的所有事件。
speedEvent
| 字段名 | 类型 | 描述 | 单位 |
|---|---|---|---|
| startTime | float | 事件的开始时间 | 1.875 / bpm |
| endTime | float | 事件的结束时间 | 1.875 / bpm |
| value | float | 事件的值 | 高度单位 |
| floorPosition | float | 速度事件开始时判定线共计以流过的速度 (仅方便计算, 高版本不存在) | 高度单位 |
judgeLineMoveEvent
| 字段名 | 类型 | 描述 | 单位 |
|---|---|---|---|
| startTime | float | 事件的开始时间 | 1.875 / bpm |
| endTime | float | 事件的结束时间 | 1.875 / bpm |
formatVersion为1
| 字段名 | 类型 | 描述 | 单位 |
|---|---|---|---|
| start | int | 事件的开始坐标 | - |
| end | int | 事件的结束坐标 | - |
-
坐标计算 (Python):
x = (v - v % 1000) // 1000y = v % 1000- 单位:
x1 / 880谱面渲染范围宽度y1 / 520谱面渲染范围高度
-
转化为formatVersion为3的坐标 (python):
- 原事件以
e表示, 新事件以ne表示 ne.start = (e.start - e.start % 1000) // 1000ne.end = (e.end - e.end % 1000) // 1000ne.start2 = e.start % 1000ne.end2 = e.end % 1000
- 原事件以
-
formatVersion为3
| 字段名 | 类型 | 描述 | 单位 |
|---|---|---|---|
| start | float | 事件的开始x坐标 | 谱面渲染范围宽度 |
| end | float | 事件的结束x坐标 | 谱面渲染范围宽度 |
| start2 | float | 事件的开始y坐标 | 谱面渲染范围高度 |
| end2 | float | 事件的结束y坐标 | 谱面渲染范围高度 |
judgeLineRotateEvent
| 字段名 | 类型 | 描述 | 单位 |
|---|---|---|---|
| startTime | int | 事件的开始时间 | 1.875 / bpm |
| endTime | int | 事件的结束时间 | 1.875 / bpm |
| start | float | 事件的开始值 | 角度 |
| end | float | 事件的结束值 | 角度 |
judgeLineDisappearEvent
| 字段名 | 类型 | 描述 | 单位 |
|---|---|---|---|
| startTime | float | 事件的开始时间 | 1.875 / bpm |
| endTime | float | 事件的结束时间 | 1.875 / bpm |
| start | float | 事件的开始值 | - |
| end | float | 事件的结束值 | - |
judgeLine
每一个judgeLine(判定线)都含有以下字段:
| 字段名 | 类型 | 描述 |
|---|---|---|
| bpm | float | 该判定线的bpm值 |
| notesAbove | JsonArray | 正面下落的音符 |
| notesBelow | JsonArray | 反面下落的音符 |
| speedEvents | JsonArray | 速度事件 |
| judgeLineMoveEvents | JsonArray | 移动事件 |
| judgeLineRotateEvents | JsonArray | 旋转事件 |
| judgeLineDisappearEvents | JsonArray | 透明度事件 |
- 注意: 所有事件及Note的有关时间的项, 单位都为
1.875 / bpms - 这里我们定义:
- “宽度单位” 为
0.05625 * 谱面渲染范围宽度 - “高度单位” 为
0.6 * 谱面渲染范围高度
- “宽度单位” 为
- 事件
- Note
音乐文件格式
目前支持的音乐文件格式包括:
.mp3.ogg.wav
注意:
mp3格式可能会存在不可预测的延迟, 请尽量使用ogg文件来避免wav为未经压缩的原始音频信号, 占用空间较多, 可能会导致谱面上传失败
扩展特性文档
prpr not only supports the official Phigros, ‘pec’, and ‘rpe’ chart format, but also added some unique features. These chart features can only be used in prpr and other clients that built on top of prpr. These features include:
The configuration of chart features need to be saved in extra.json which can be found in the root directory of the zip file. In order to use the chart features, you need to edit the JSON file manually. If you don’t know what JSON is, see JSON Tutorial.
BPM Config
Before making any configurations, you need to set the BPM of the song/track in extra.json. For example:
{
   "bpm": [
      { "time": [0, 0, 1], "bpm" : 200.0 },
      { "time": [10, 1, 2], "bpm" : 250.0 }
   ],
   ...
}
This shows that the song has an initial BPM of 200, the BPM then changes to 250 at the 10.5 beat.
Animation variables
Animation variables are often used in charts. For example, in RPE, the X coordinate change event is actually the X coordinate as an animation variable.
There are 2 formats for prpr’s animation variables. The first is for a constant value, which means that the variable will not change and will always have the same value. This format is applied just for the ease of filling up the fields. The second format is the same as the one in RPE and is composed of multiple Event. The format of a single Event is shown below:
{
	"startTime": [0, 0, 1],
	"endTime": [0, 0, 1],
	"easingType": 2,
	"easingLeft": 0.0,
	"easingRight": 1.0,
	"start": ...,
	"end": ...
}
where startTime and endTime are the event’s start time and end time respectively; easingType is the type of easing; easingLeft and easingRight are optional, it represents the start and end position of the ease.
start and end represent the values at the beginning and end of the time. The type of the value here depends on the type of the animation variable itself, which can be any of the following types:
float: a single decimal.vec2: 2 decimal representing a 2D vector, represented as an array.color: 4 integers (0-255) that represents a color, the format is[R, G, B, A].
For example, the following animation variable will vary linearly from 0 to 1 over a given time period:
[
	{
		"startTime": [2, 0, 1],
		"endTime": [4, 0, 1],
		"easingType": 2,
		"start": 0.0,
		"end": 0.1
	}
]
Effects
Effect is a feature that applies shader to the entire chart for a specified amount of time. They can be used to achieve visual effects that are impossible or difficult to achieve in vanilla charts. prpr has some premade shaders, or you can also write your own shaders. For more details, see Writing your own shader.
Format
You need to add the effects field in extra.json, whose content is an array of Effect.
Effect
The format of a single Effect is shown below:
{
	"start": [0, 0, 1],
	"end": [0, 0, 1],
	"shader": "Name of shader",
	"global": false,
	"vars": {
		...
	}
}
start and end specify the start and end time respectively in the same format as RPE’s default time format ([bar number, numerator, denominator]).
shader represents the shader’s name, it can be a built-in shader, or a custom shader.
global determines whether the effect will affect UI elements (combo count, pause button, etc). This field can be left blank, and its default value is false.
vars is an optional parameter, it is a mapping of variable names to animation variables, it is used to specify the parameters of the shader (or rather: shader’s uniform variables). i.e. suppose I need to specify the values of 2 variables, power and radius, I can write it like this:
{
	...,
	"vars": {
		"power": ...,
		"radius": ...
	}
}
Example
The following example will apply the built-in chromatic shader from [2, 0, 1] to [4, 0, 1] and will vary the power parameter linearly from 0 to 0.1 in this time period, with the sampleCount fixed at 5:
{
	...,
	"effects": [
		{
			"start": [2, 0, 1],
			"end": [4, 0, 1],
			"shader": "chromatic",
			"vars": {
				"power": [
					{
						"startTime": [2, 0, 1],
						"endTime": [4, 0, 1],
						"easingType": 2,
						"start": 0.0,
						"end": 0.1
					}
				],
				"sampleCount": 5
			}
		}
	]
}
Built-in shaders
You can view all the built-in shaders, along with their parameters and related descriptions, at here.
Built-in shaders
This section lists prpr’s built-in shaders.
chromatic
Chromatic effect.
Parameters
sampleCount(integer, default value:3, Range:1-64): Sample count, the higher the value, the display will be more coherent, and the overhead will be higher.power(float, default value:0.01): The intensity, or offset distance.
circleBlur
Dot blurring. Will enlarge the pixel blur as highlight, recommended to use with parameter.
Parameters
size(float, default value:10.0): The size of the origin, in pixels.
fisheye
Fisheye effect. When power is negative, you can make tunneling effect.
power as negative value:

power as positive value:
Parameters
power(float, default value:-0.1): Scale of fisheye effect.
glitch
Confusion/Error effect. The effect produces an indeterminate flicker over time.
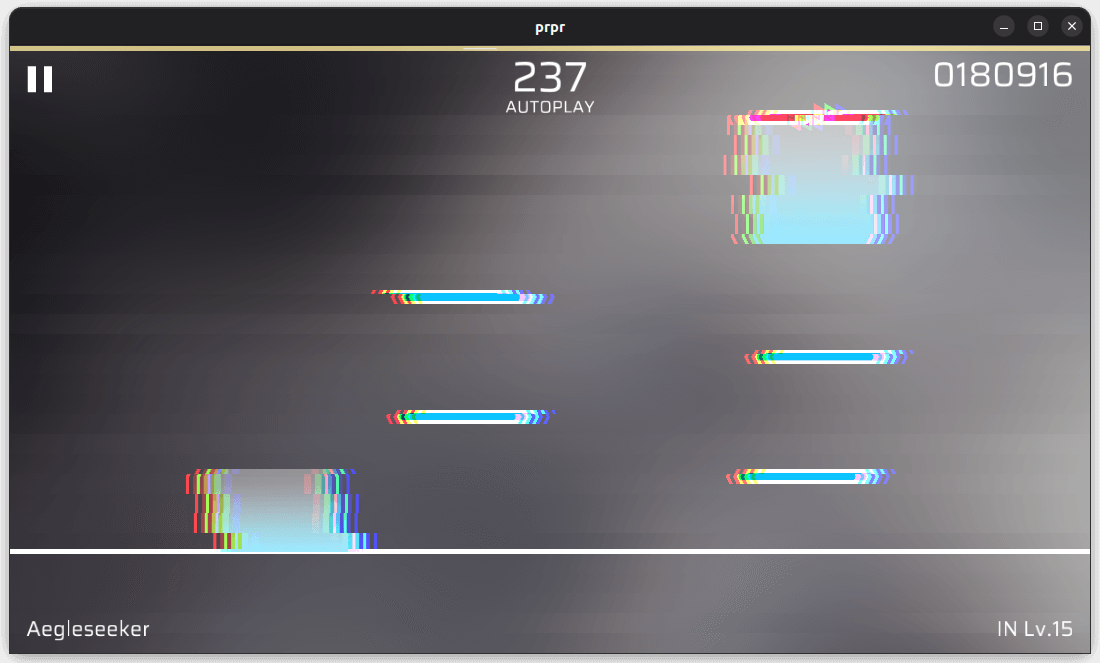
Parameters
power(float, default value:0.3): Flicker intensity.rate(float, default value:0.6, range:0-1): Flicker frequency.0for no flickers,1for always flicker.speed(float, default value:5.0): Speed of flickering animation.blockCount(float, default value:30.5): Look at above images, number of misaligned strips (approximate).colorRate(float, default value:0.01, range:0-1): Distance of color difference.
grayscale
Grayscale effect.
Parameters
factor(float, default value:1.0): Grayscale level.0for no grayscale processing,1for complete grayscale processing.
noise
Noise effect. Applies a random layer of blur to the screen.
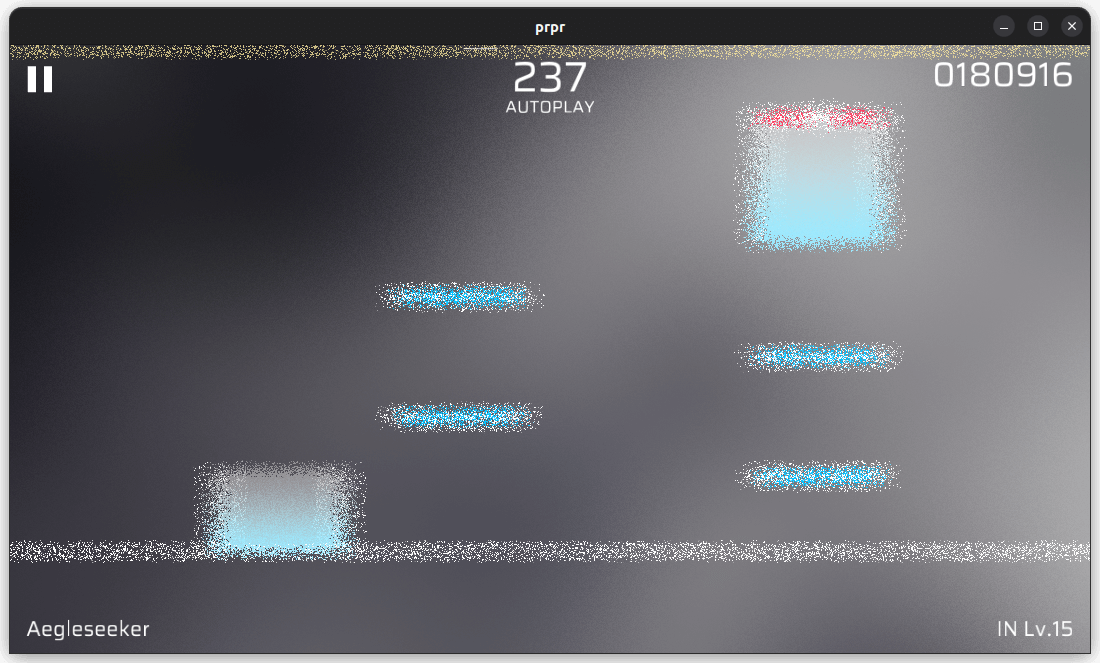
Parameters
seed(float, default value:81.0): Used to generate random patterns. By varying the seeds continuously, the pattern can be changed continuously.power(float, default value:0.03, range:0-1): Look at above images, intensity of blur (Range of pixel offset).
pixel
Pixelated effect.
![]()
Parameters
size(float, default value:10.0): Size of individual pixels after pixelation.
radialBlur
Radial blur.
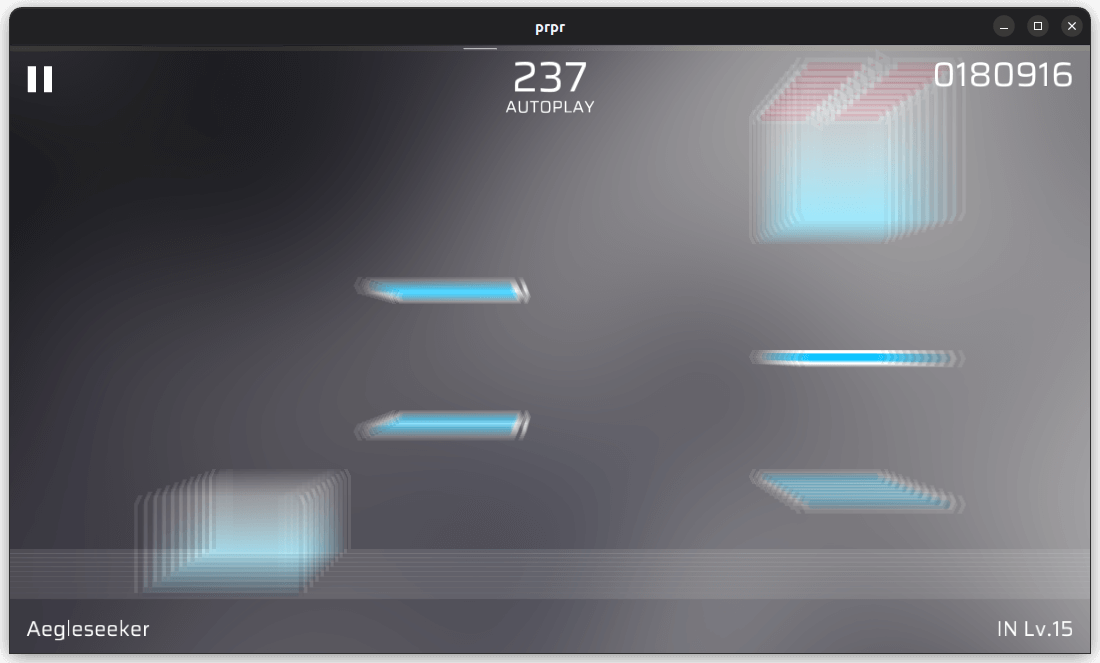
Parameters
centerX(float, default value:0.5, range:0-1): X coordinate of the effect center.centerY(float, default value:0.5, range:0-1): Y coordinate of the effect center.power(float, default value:0.01, range:0-1): Intensity of effect.sampleCount(integer, default value:3, range:1-64): Sample count, the higher the value, the display will be more coherent, and the overhead will be higher.
shockwave
Shockwave effect. Recommended to use with progress parameter.
Parameters
progress(float, default value:0.2, range:0-1): Progress of the effect. Shockwave is an animation,0for start of animation,1for end of animation).centerX(float, default value:0.5, range:0-1): X coordinate of the effect center.centerY(float, default value:0.5, range:0-1): Y coordinate of the effect center.width(float, default value:0.1): Width of the effect.distortion(float, default value:0.8): Intensity of distortion.expand(float, default value:10.0): Breadth of expansion.
vignette
Virtual lighting effect. Will darken or tint the edges of the screen to other colors, can be used to simulate some of Arcaea’s anomaly effect.
Parameters
color(颜色,默认黑色 [r, g, b, a]):边缘的颜色;extend(float, default value:0.25, range:0-1): The extension from the edge, the larger the value, the more black parts.radius(float, default value:15.0): Size of central light, the smaller the value, the greater the range affacted.
Writing your own shaders
Fragment shaders are used for making the special effects. You can write your own shaders and attach them to the chart’s zip file. In the shader field, you need to fill in the /shader_path. Note that the / must be included and this field must be filled in because it distinguishes the built-in shaders from the custom shaders.
For compatibility, GLSL 1.00 is used.
Built-in variables
prpr has the following variables used for shaders:
varying vec2 uv; // UV of texture
uniform vec2 screenSize; // Size of the screen (Note that it refers to the entire screen, and not just the chart/gameplay area)
uniform sampler2D screenTexture; // Texture of the screen (Refers to the texture of the entire screen, and not just the chart/gameplay area)
uniform float time; // The chart's time in seconds
There are also variables that exists, but these variables are useless in the fragment shaders. When defining your own variables, you should avoid these variables’ name:
uniform mat4 Model;
uniform mat4 Projection;
uniform vec2 UVScale;
Shader variables
In order to define your own parameters in the chart, you need to define your shader uniform variables like this:
uniform type name; // %def%
where type is the variable type, currently float, vec2, and vec4 are supported; name is the variable name; def is the default value. Any of the 3 values cannot be left out.
Example
The example below shows that the shader will overlay the screen with varying shades of red depending on the value of factor:
#version 100
precision mediump float;

varying lowp vec2 uv;
uniform sampler2D screenTexture;

uniform float factor; // %0.5% 0..1

void main() {
  gl_FragColor = mix(texture2D(screenTexture, uv), vec4(1.0, 0.0, 0.0, 1.0), factor);
}
Video Background
In prpr, you can play a video in the background, but the audio will not be played. However, since most videos have a large file size and the upload limit for prpr charts is 10MB, charts that have large BGA may not be uploaded. If you need to have a video background, it is recommended that the video background is used for small animations and compressed (including but not limited to removing audio).
Format
You need to add a videos field in the extra.json file, whose content is an array of Video.
Video
The format for a single Video is as shown below:
{
	"path": "bga.mp4",
	"time": [0, 0, 1],
	"scale": "cropCenter",
	"alpha": 1.0,
	"dim": 0.3
}
The path field is mandatory to be filled in, and it should point to the file path of the video, the other four fields are optional.
time indicates the start time of the video in terms of beat numbers.
scale indicates how the video is scaled. When making a chart, you need to consider how the chart will look at different aspect ratios. For this purpose, the scale field has 3 options available:
cropCenter(default): Scales up the video uniformly until it fills the screen.inside: Scales down the video uniformly, ensures that the entire video is shown within the screen.fit: Forcefully stretch the video to the entire screen.
alpha 和 dim 分别代表视频的不透明度(若透明,则会显示下方的曲绘)和昏暗程度,他们都是 动画变量。
Unlock animation
Please note the difference between unlock animation and video background
The unlock animation allows a video to be played before the player’s initial playthrough of the chart.
Usage
The UI is currently not ready and is slightly cumbersome. The following steps are recommended for Windows.
If your chart already has info.yml, please skip to step three.
- Import your chart in Phira.
- Search for your chart ID in
data/charts/custom(e.g.9067228), locate the corresponding folder, findinfo.ymlin the folder, and copy it to your chart folder (Note that the folder mentioned here is not the folder that you get after importing into Phira, it’s the folder that you extracted from pez). - Add the unlock animation to your chart folder (Note that the folder mentioned here is not the folder that you get after importing into Phira, it’s the folder that you extracted from pez), assuming the file name is
unlock.mp4. - Find the line
unlockVideo: nullininfo.ymland replace it withunlockVideo: unlock.mp4(or add that line if it’s not there). - Re-import your chart.
Phira 活动说明
Phira 已经成功~~(存疑)~~举办了一些活动, 本文主要介绍在目前的项目结构下, Phira 活动相关的机制
基础概念
活动
活动和活动页面是一一对应的关系, 活动页面的设计采用 UML 语言, 相关的文档见此处
活动具有一个 owner, 通常设置为活动主办方的个人或团体账户, 活动隐藏时仅对服务器管理员和其 owner 可见
活动还具有起始时间, 开始时间前活动可见但无法参与, 在开始时间服务器会向全服务器玩家发送游戏内消息告知活动已开始, 结束时间后活动无法报名参加
活动可以锁定, 锁定后所有人均无法报名参加, 但不影响可见性
活动参加后会产生排行榜, 具体运算规则需要单独设置, 一般保持活动锁定
谱面合集
实际上谱面合集可以任意创建, 与活动关联并不紧密
活动页面中可以引用一个或多个谱面合集, 谱面合集中的谱面不会受到 hidden 等字段的限制, 总是对所有玩家可见
举办活动
要举办一次活动, 活动主办方需要向 TeamFlos 时任社区管理员或指定外部联络人员(下称对接人员)提供相关材料, 具体为
- 活动流程, 或活动策划大纲
- 活动页面设计 UML 源码
- 活动页面设计中用到的美术素材(考虑到服务器负载和可用性等问题, 推荐采用 self host 的方式, 向 TeamFlos 提供的源码中包含相关素材的 URL 即可)
- 活动需要利用的谱面合集与其包含相应的谱面
在此基础上有额外需求请和对接人员确认, 以便及时进行可行性评估。
UML documentation
UML 文件是 UI 描述文件, 可以用来创建于代码解耦的可定制界面.
Grammar
UML 文件格式是纯文本的人类可读格式. UML 由 Element(元素), 注释和变量定义语句构成, 每个元素占据一或多行.
Coordinates
坐标原点在进入活动页后下滑一屏后的左上角处, x 轴向右, y 轴向下.
屏幕宽度总是 2, 可以通过宽高比计算屏幕高度, 参见内置变量.
Data type
UML 中有如下数据类型:
Float
单精度浮点数, 任意的数字都是 Float.
Rect
矩形. 由 [left, top, width, height](分别是左上角 x 坐标, 左上角 y 坐标, 矩形宽度, 矩形高度)定义.
Rect 在定义后可以访问一些只读属性, 具体包括:
Rect.l或Rect.x: 左上角x坐标Rect.t或Rect.y: 左上角y坐标Rect.w: 矩形宽度Rect.h: 矩形高度Rect.r: 右下角x坐标Rect.b: 右下角y坐标Rect.cx: 中心x坐标Rect.cy: 中心y坐标
Bool
布尔值. 值是 true 或 false, 目前只能用于元素的属性中.
String
字符串. 用双引号括起来的文本, 用于表示按钮行为, 颜色, URL, 具体如下:
Color: 颜色. 可以是十六进制 RGB 或 ARGB 颜色值(如"#ff0000"或"#7fffffff")或颜色名(如"red"). 目前可用的颜色名有:"white""black""red""blue""yellow""green""gray"
Action: 按钮行为. 可用的值有:"join": 参与该活动"open:url": Opens the specified URL
URL: 网址
Expression
表达式是由 Float, 变量, 运算符和函数组成的. 表达式经过计算是 Float 类型的值.
Operators
The operators that can be used are:
+: Addition-: Subtraction*: Multiplication/: Division(): Parentheses, used to change the order of operations==: Is equal to,1if true,0otherwise.! =: If not equal, value is1if true,0otherwise.>: Is more than,1if true,0otherwise.<: Is less than,1if true,0otherwise.>=: Is more than or equal to,1if true,0otherwise.<=: Is less than or equal to,1if true,0otherwise.
函数
可以使用的函数有:
sin(x): 正弦函数cos(x): 余弦函数tan(x): 正切函数abs(x): Absolute value functionexp(x): 指数函数atan2(x): 反正切函数ln(x): 自然对数函数sig(x): 符号函数,x为+0或正数时返回1, 为-0或负数时返回-1step(x, y): 阶跃函数,x < y为0时返回1, 否则返回0floor(x): 向下取整函数ceil(x): 向上取整函数round(x): 四舍五入函数max(x, y...): 最大值函数min(x, y...): 最小值函数clamp(x, min, max): 将x限制在min和max之间
其中三角函数和反三角函数使用弧度制.
Variable
变量是 UML 中可以被读取或者写入的值, 定义方式如下:
let name = value
定义一个变量 name, 其值为 value. value 可以是 Float 或 Rect 类型的值, 或结果是 Float 或 Rect 类型的表达式.
变量可以被重复定义, 但只有最后一次定义的值会被使用. 定义变量后, 你可以在新建元素或定义其他变量时使用这个变量.
Built-in variables
UML 内置了如下变量:
t: 当前时间, 单位为秒top: 实际高度与实际宽度之比o: 滑动距离joined: 是否已经参与了该活动, 参与了时值为1, 否则为0$h: The maximum height that the user can scroll, limit the user’s scrolling range by setting the value of this variable
UML 并不具备事件功能, 可以利用
t,o和按钮的按下时刻来为页面添加动态效果, 如动画, 换页等.
全局变量
全局变量是在 UML 文件的任何地方都可以被读取或者写入的变量. 全局变量的定义方式如下:
global name = @type
其中, type 只能为 btn. 此后, 你仍然可以通过 let 的方式写入全局变量, 只有最后一次定义的值会被使用.
活动界面在每一帧都会被重画, 这意味着 UML 在每一帧都会重新计算所有变量的值.
但按钮的一些属性需要在帧之间保持不变, 因此需要使用全局变量.
Element
元素是活动界面中的可视或可交互的对象, 定义方式如下:
type(attr1: value1, attr2: value2, ...) { Hello! }
其中, type 为元素的类型, attrN 和 valueN 分别为属性名称和属性值. 不同类型的元素的属性也各不相同, 其中一些是必填, 会在介绍元素时具体标注.
元素的 id 属性为所有元素共有的可选属性, 在元素被定义后, 其 id 属性将自动对应一个表示该元素绘制范围的 Rect 变量.
后面的 { Hello } 是可选内容, 代表该元素的文字内容. 只对 p(段落元素)生效.
Paragraph Element p
p(id, x, y, ax, ay, size, ml, mw, bl, c) {
   Text
}
id(选填): 元素 IDx(选填, 默认为0): 文本x坐标y(选填, 默认为0): 文本y坐标ax(选填, 默认为0): 文本横向对齐,[0, 1]间的浮点数. 为0时, 按照x坐标左对齐, 为1时右对齐,0.5时居中ay(选填, 默认为0): 文本纵向对齐, 具体意义同上size(选填, 默认为1): 文本大小ml(选填, 默认为false): 文本是否多行渲染, 只在设置了mw的条件下有效mw(选填): 文本最大宽度. 在单行模式下, 超出范围的文本将被省略;多行模式下将自动换行bl(选填, 默认为true): 纵向对齐时是否按照基准线对齐c(选填, 默认为"white"): 文本颜色Text(必填): 文本内容
p的位置并不通过完整的矩形来定义, 但你仍可以用p的id属性来获取其矩形区域.
Image Element img
img(id, url, r, c, t)
id(选填): 元素 IDurl(必填): 图片 URL, 用双引号括起来r(必填): 图片显示的位置矩形, 类型为Rectc(选填, 默认为"white"): 在图片上叠加的颜色. 若颜色半透明, 图片也会半透明t(选填, 默认为cropCenter): 图片的裁剪方式. 可选值有:cropCenter: 保持图片比例, 从图片中心裁剪,保证r被完全填满inside: 保持图片比例, 使图片完全显示在r中fit: 拉伸为r的大小
Chart Collection Element col
col(id, cid, r, rn, rh)
id(选填): 元素 IDcid(必填): 谱面合集 IDr(必填): 谱面合集显示的位置矩形, 类型为Rectrn(选填, 默认为4): 一行显示的谱面数rh(选填, 默认为0.3): 谱面高度
Button Element btn
btn(id, r, action)
id(选填): 元素 IDr(必填): 按钮显示的位置矩形, 类型为Rectaction(选填): 按钮的点击行为, 可用的值参见数据类型
在元素被定义后, 其 id 属性除了表示该元素绘制范围的 Rect 变量, 还具有以下属性:
id.pressing: 按钮是否正在被按下, 被按下时值为1, 否则为0id.last: 按钮上次被按下的时刻, 从未被按下时值为-1id.count: 按钮被按下的次数
Comment
你可以用 # 开头的行添加注释, 除了部分特殊格式的注释(注释表达式), 注释不会被执行, 可以用来提示当前代码的作用.
注释行在 # 后至少有一个字符, 否则会导致报错.
Comment Expression
注释表达式是一种特殊的注释, 它是为了兼容旧版本设计的, 可以被执行的注释. 注释表达式的格式如下:
#>exp(attr1: value1, attr2: value2, ...)
其中, exp 表示该表达式的类型, 括号内的是该表达式的属性, 是可选内容, attrN 和 valueN 分别为属性名称和属性值. 不同类型的表达式的属性也各不相同, 其中一些是必填, 会在介绍表达式时具体标注.
下面逐个介绍各类型的注释表达式:
结束表达式 #>pop
#>pop
注释表达式以行为单位, 作用于数行内的元素, 变量等, 其作用范围是从表达式所在行开始到下一个 #>pop 表达式所在行结束. 因此, 多数其他表达式后面都必须跟一个 #>pop 表达式, 表示结束当前表达式的作用范围.
旋转表达式 #>rot
#>rot(angle, cx, cy)
angle(必填): 旋转角度, 单位为弧度cx(必填): 旋转中心x坐标cy(必填): 旋转中心y坐标
平移表达式 #>tr
#>tr(dx, dy)
dx(选填, 默认为0): 横向平移距离dy(选填, 默认为0): 纵向平移距离
透明度表达式 #>alpha
#>alpha(a)
a(optional, default0): transparency, range is[0, 1],0is fully transparent,1is fully opaque.
矩阵表达式 #>mat
#>mat(x00, x01, x02, x03, x10, x11, x12, x13, x20, x21, x22, x23, x30, x31, x32, x33)
x00(选填, 默认为0): 矩阵第一行第一列的值x01(选填, 默认为0): 矩阵第一行第二列的值x02(选填, 默认为0): 矩阵第一行第三列的值x03(选填, 默认为0): 矩阵第一行第四列的值x10(选填, 默认为0): 矩阵第二行第一列的值x11(选填, 默认为0): 矩阵第二行第二列的值x12(选填, 默认为0): 矩阵第二行第三列的值x13(选填, 默认为0): 矩阵第二行第四列的值x20(选填, 默认为0): 矩阵第三行第一列的值x21(选填, 默认为0): 矩阵第三行第二列的值x22(选填, 默认为0): 矩阵第三行第三列的值x23(选填, 默认为0): 矩阵第三行第四列的值x30(选填, 默认为0): 矩阵第四行第一列的值x31(选填, 默认为0): 矩阵第四行第二列的值x32(选填, 默认为0): 矩阵第四行第三列的值x33(选填, 默认为0): 矩阵第四行第四列的值
可以通过矩阵表达式实现元素的缩放, 平移, 旋转等变换.
条件表达式 #>if 等
#>if(condition)

#>elif(condition)

#>else

#>fi
condition(必填): 条件表达式, 可以是任意表达式, 当值为0表示假, 否则表示真.
需要注意的是 #>if 并不适用 #>pop 来结束, 而是使用 #>fi.
低版本兼容表达式 #>if-no-v2
#>if-no-v2
如果你的 UML 文件中使用了 V2 版本中没有的特性, 可以在使用这个表达式显示部分元素, 以提示使用低版本的 Phira 客户端的用户尽快升级.
注释表达式是 V2 版本的新功能, 只在 V2 版本中有效, 在 V1 版本中会被当作一般注释忽略.
#if-no-v2表达式实际上的作用是忽略其作用范围内的内容.
How to Debug
编译 phira-main 时加入参数 --features event_debug, 然后在 Phira 客户端可执行文件同目录下新建名为 test.uml 的文件. 此后进入任意一个活动, 页面内容将与 test.uml 保持实时同步.
Example UML
提供了几个 UML 的样例, 可供参考.
Event Template
此文件为 sjfhsjfh 于 2024-02-07 凌晨为 _2024 羽笙杯_创建的活动文件, 鉴于活动方要求过于抽象, sjfhsjfh 决定写一个仅包含基本功能的页面.
UML 源码
2024 Xmas
这是 sjfhsjfh 在
UML 源码
let w = 1920
let h = 1080
let rh = 2 * top

let bg_rect = [0, 0 - rh + o, 2, rh]

img(id: bg, url: "https://files-cf.phira.cn/events/xmas-2023-kedmue/bg.jpeg", r: bg_rect, t: cropCenter)

# Back button
let back_btn_rect = [bg_rect.x + 100 / w * 2, bg_rect.t + 50 / h * rh, -45 / w * 2, 75 / h * 1.18]
img(id: back_btn_img, url: "https://files-cf.phira.cn/ltc-arrow.png", r: back_btn_rect, t: fit)
btn(id: back_btn, r: back_btn_rect, action: "exit")

let chart_h = 0.4 * top

# left-top
let dx1 = 0.003 * sin(90 * t) + 0.01 * sin(11.5 * (1 + t / 100000) * t)
let dy1 = 0.004 * sin(87 * t) + 0.008 * sin(11.3 * (1 + t / 10000) * t)
let s1 = 1 + 0.03 * sin(10 * exp(1.01 * ln(t)) - 2 * t)
let col_r1 = [bg_rect.l + 0.87 + dx1 + 0.45 * (1 - s1), bg_rect.t + 0.452 * rh + dy1 + chart_h * (1 - s1), 0.45 * s1, chart_h * s1]
col(id: col_xmas, cid: 12762, r: col_r1, rn: 1, rh: chart_h * s1)

# left-bottom
let dx2 = 0.003 * sin(89 * t) + 0.01 * sin(12 * (1 + t / 99000) * t)
let dy2 = 0.004 * sin(88 * t) + 0.0069 * sin(15 * (1 + t / 11000) * t)
let s2 = 1 + 0.03 * sin(10.45 * exp(0.99 * ln(t)) + t)
let col_r2 = [bg_rect.l + 1.02 + dx2 + 0.45 * (1 - s2), bg_rect.t + 0.72 * rh + dy2 + chart_h * (1 - s2), 0.45 * s2, chart_h * s2]
col(id: col_xmas, cid: 12769, r: col_r2, rn: 1, rh: chart_h * s2)

# right-top
let dx3 = 0.003 * sin(91 * t) + 0.01 * sin(12.5 * (1 + t / 109000) * t)
let dy3 = 0.0035 * sin(86 * t) + 0.0082 * sin(11.6 * (1 + t / 9900) * t)
let s3 = 1 + 0.03 * sin(10.2 * exp(1.02 * ln(t)) - 3 * t)
let col_r3 = [bg_rect.l + 1.42 + dx3 + 0.45 * (1 - s3), bg_rect.t + 0.49 * rh + dy3 + chart_h * (1 - s3), 0.45 * s3, chart_h * s3]
col(id: col_xmas, cid: 12770, r: col_r3, rn: 1, rh: chart_h * s3)

let $h = 0
Advanced skills
UML 是一种非常简单的语言, 但是通过组合简单的元素, 我们也能实现一些较为复杂的效果.
Page Switch
如果我们希望活动界面包括多个页面, 可以通过在超出屏幕的部分放置其他页面的内容, 并通过整个页面所有元素的移动达到类似页面切换的效果.
例如, 我们可以这样放置横纵六个页面的内容:
            |-----------|
            |   3, 2    |
            |           |
            |-----------|
            |   2, 2    |
            |           |
|-----------|-----------|-----------|-----------|
|   1, 1    |   1, 2    |   1, 3    |   1, 4    |
|           |           |           |           |
|-----------|-----------|-----------|-----------|
可以在每个页面的左上角放置一个 o 方便计算每个页面上的元素的位置:
# o
let tmp_rect = [page_offset_x_1 + page_offset_x_2 + page_offset_x_3, page_offset_y_1 + page_offset_y_2, 0.1, 0.1]
img(id: o11, url: "https://teamflos.github.io/phira-docs/assets/uml/advanced/page_switch/blank.png", r: tmp_rect, t:fit)

let tmp_rect = [o11.l + 2, o11.t, 0.1, 0.1]
img(id: o12, url: "https://teamflos.github.io/phira-docs/assets/uml/advanced/page_switch/blank.png", r: tmp_rect, t:fit)

let tmp_rect = [o11.l + 4, o11.t, 0.1, 0.1]
img(id: o13, url: "https://teamflos.github.io/phira-docs/assets/uml/advanced/page_switch/blank.png", r: tmp_rect, t:fit)

let tmp_rect = [o11.l + 6, o11.t, 0.1, 0.1]
img(id: o14, url: "https://teamflos.github.io/phira-docs/assets/uml/advanced/page_switch/blank.png", r: tmp_rect, t:fit)

#>if(page_offset_y_1_ratio)
let tmp_rect = [o12.l, o11.t - 2 * top, 0.1, 0.1]
img(id: o22, url: "https://teamflos.github.io/phira-docs/assets/uml/advanced/page_switch/blank.png", r: tmp_rect, t:fit)
#>fi

#>if(page_offset_y_2_ratio)
let tmp_rect = [o12.l, o11.t - 4 * top, 0.1, 0.1]
img(id: o32, url: "https://teamflos.github.io/phira-docs/assets/uml/advanced/page_switch/blank.png", r: tmp_rect, t:fit)
#>fi
在以上的定义中, 我们通过 page_offset_x_n 和 page_offset_y_n 定义了 o11 的偏移量, 由于其他页面的偏移量都是相对于 o11 的, 所以在 o11 移动时, 其他页面的元素也会跟着移动.
此外, 我们还通过 #>if 设置了 o22 和 o32 绘制的时机. 这是为了防止纵向切换后, 用户在活动首屏看到当前页面上方页面的内容. 通过这个值, 我们可以将页面上方的内容移出屏幕.
为了得出这些偏移量的具体值, 我们需要使用定义一些用于切换页面的按钮, 并通过按钮的 last 属性计算出偏移量的值.
global btn_r_1 = @btn
global btn_l_2 = @btn

global btn_r_2 = @btn
global btn_l_3 = @btn

global btn_r_3 = @btn
global btn_l_4 = @btn

global btn_r_3 = @btn
global btn_l_4 = @btn

global btn_u_1 = @btn
global btn_d_2 = @btn

global btn_u_2 = @btn
global btn_d_3 = @btn

# btn_lr_1234
let tmp_rect = [o12.l - 0.1, o11.t + top - 0.05, 0.1, 0.1]
img(id: btn_r_1_bkg, url: "https://teamflos.github.io/phira-docs/assets/uml/advanced/page_switch/right_arrow.png", r: tmp_rect, t:fit)
btn(id: btn_r_1, r: tmp_rect, t:fit)

let tmp_rect = [o12.l, o12.t + top - 0.05, 0.1, 0.1]
img(id: btn_l_2_bkg, url: "https://teamflos.github.io/phira-docs/assets/uml/advanced/page_switch/left_arrow.png", r: tmp_rect, t:fit)
btn(id: btn_l_2, r: tmp_rect, t:fit)

let tmp_rect = [o13.l - 0.1, o12.t + top - 0.05, 0.1, 0.1]
img(id: btn_r_2_bkg, url: "https://teamflos.github.io/phira-docs/assets/uml/advanced/page_switch/right_arrow.png", r: tmp_rect, t:fit)
btn(id: btn_r_2, r: tmp_rect, t:fit)

let tmp_rect = [o13.l, o13.t + top - 0.05, 0.1, 0.1]
img(id: btn_l_3_bkg, url: "https://teamflos.github.io/phira-docs/assets/uml/advanced/page_switch/left_arrow.png", r: tmp_rect, t:fit)
btn(id: btn_l_3, r: tmp_rect, t:fit)

let tmp_rect = [o14.l - 0.1, o13.t + top - 0.05, 0.1, 0.1]
img(id: btn_r_3_bkg, url: "https://teamflos.github.io/phira-docs/assets/uml/advanced/page_switch/right_arrow.png", r: tmp_rect, t:fit)
btn(id: btn_r_3, r: tmp_rect, t:fit)

let tmp_rect = [o14.l, o14.t + top - 0.05, 0.1, 0.1]
img(id: btn_l_4_bkg, url: "https://teamflos.github.io/phira-docs/assets/uml/advanced/page_switch/left_arrow.png", r: tmp_rect, t:fit)
btn(id: btn_l_4, r: tmp_rect, t:fit)

# btn_ud_123
let tmp_rect = [o12.l + 1 - 0.05, o12.t, 0.1, 0.1]
img(id: btn_u_1_bkg, url: "https://teamflos.github.io/phira-docs/assets/uml/advanced/page_switch/up_arrow.png", r: tmp_rect, t:fit)
btn(id: btn_u_1, r: tmp_rect, t:fit)

#>if(page_offset_y_1_ratio)
let tmp_rect = [o22.l + 1 - 0.05, o12.t - 0.1, 0.1, 0.1]
img(id: btn_d_2_bkg, url: "https://teamflos.github.io/phira-docs/assets/uml/advanced/page_switch/down_arrow.png", r: tmp_rect, t:fit)
btn(id: btn_d_2, r: tmp_rect, t:fit)

let tmp_rect = [o22.l + 1 - 0.05, o22.t, 0.1, 0.1]
img(id: btn_u_2_bkg, url: "https://teamflos.github.io/phira-docs/assets/uml/advanced/page_switch/up_arrow.png", r: tmp_rect, t:fit)
btn(id: btn_u_2, r: tmp_rect, t:fit)
#>fi

#>if(page_offset_y_2_ratio)
let tmp_rect = [o32.l + 1 - 0.05, o22.t - 0.1, 0.1, 0.1]
img(id: btn_d_3_bkg, url: "https://teamflos.github.io/phira-docs/assets/uml/advanced/page_switch/down_arrow.png", r: tmp_rect, t:fit)
btn(id: btn_d_3, r: tmp_rect, t:fit)
#>fi
其中按钮 id 最后的编号表示按钮所在的页面.
在定义了按钮后, 我们可以通过按钮的 last 属性计算出偏移量的值:
let animation_duration = 0.7
let animation_speed = 1 / animation_duration

let a = btn_r_1.last
let b = btn_l_2.last
# back and forth
let x = min((t - a) * animation_speed, 1)
let y = max(1 - (t - b) * animation_speed, 0)

# a > b ? x : y
let page_offset_x_1_ratio = (a > b) * x + (a <= b) * y

# easeInOutQuad
let x = 4 * page_offset_x_1_ratio * page_offset_x_1_ratio * page_offset_x_1_ratio
let y = 1 - (-2 * page_offset_x_1_ratio + 2) * (-2 * page_offset_x_1_ratio + 2) * (-2 * page_offset_x_1_ratio + 2) / 2
let page_offset_x_1_ratio_eased = (page_offset_x_1_ratio < 0.5) * x + (page_offset_x_1_ratio >= 0.5) * y
let page_offset_x_1 = page_offset_x_1_ratio_eased * -2
关于纵向切换的偏移量,我们可以通过类似的方法计算出.
这样, 我们就完成了页面切换效果.
完整的 UML 代码如下:
let animation_duration = 0.7
let animation_speed = 1 / animation_duration

global btn_r_1 = @btn
global btn_l_2 = @btn

global btn_r_2 = @btn
global btn_l_3 = @btn

global btn_r_3 = @btn
global btn_l_4 = @btn

global btn_r_3 = @btn
global btn_l_4 = @btn

global btn_u_1 = @btn
global btn_d_2 = @btn

global btn_u_2 = @btn
global btn_d_3 = @btn

# ---
let a = btn_r_1.last
let b = btn_l_2.last
# back and forth
let x = min((t - a) * animation_speed, 1)
let y = max(1 - (t - b) * animation_speed, 0)

# a > b ? x : y
let page_offset_x_1_ratio = (a > b) * x + (a <= b) * y

# easeInOutQuad
let x = 4 * page_offset_x_1_ratio * page_offset_x_1_ratio * page_offset_x_1_ratio
let y = 1 - (-2 * page_offset_x_1_ratio + 2) * (-2 * page_offset_x_1_ratio + 2) * (-2 * page_offset_x_1_ratio + 2) / 2
let page_offset_x_1_ratio_eased = (page_offset_x_1_ratio < 0.5) * x + (page_offset_x_1_ratio >= 0.5) * y
let page_offset_x_1 = page_offset_x_1_ratio_eased * -2
# ---

# ---
let a = btn_r_2.last
let b = btn_l_3.last
let x = min((t - a) * animation_speed, 1)
let y = max(1 - (t - b) * animation_speed, 0)
let page_offset_x_2_ratio = (a > b) * x + (a <= b) * y

let x = 4 * page_offset_x_2_ratio * page_offset_x_2_ratio * page_offset_x_2_ratio
let y = 1 - (-2 * page_offset_x_2_ratio + 2) * (-2 * page_offset_x_2_ratio + 2) * (-2 * page_offset_x_2_ratio + 2) / 2
let page_offset_x_2_ratio_eased = (page_offset_x_2_ratio < 0.5) * x + (page_offset_x_2_ratio >= 0.5) * y
let page_offset_x_2 = page_offset_x_2_ratio_eased * -2
# ---

# ---
let a = btn_r_3.last
let b = btn_l_4.last
let x = min((t - a) * animation_speed, 1)
let y = max(1 - (t - b) * animation_speed, 0)
let page_offset_x_3_ratio = (a > b) * x + (a <= b) * y

let x = 4 * page_offset_x_3_ratio * page_offset_x_3_ratio * page_offset_x_3_ratio
let y = 1 - (-2 * page_offset_x_3_ratio + 2) * (-2 * page_offset_x_3_ratio + 2) * (-2 * page_offset_x_3_ratio + 2) / 2
let page_offset_x_3_ratio_eased = (page_offset_x_3_ratio < 0.5) * x + (page_offset_x_3_ratio >= 0.5) * y
let page_offset_x_3 = page_offset_x_3_ratio_eased * -2
# ---

# ---
let a = btn_u_1.last
let b = btn_d_2.last
let x = min((t - a) * animation_speed, 1)
let y = max(1 - (t - b) * animation_speed, 0)
let page_offset_y_1_ratio = (a > b) * x + (a <= b) * y

let x = 4 * page_offset_y_1_ratio * page_offset_y_1_ratio * page_offset_y_1_ratio
let y = 1 - (-2 * page_offset_y_1_ratio + 2) * (-2 * page_offset_y_1_ratio + 2) * (-2 * page_offset_y_1_ratio + 2) / 2
let page_offset_y_1_ratio_eased = (page_offset_y_1_ratio < 0.5) * x + (page_offset_y_1_ratio >= 0.5) * y
let page_offset_y_1 = page_offset_y_1_ratio_eased * 2 * top
# ---

# ---
let a = btn_u_2.last
let b = btn_d_3.last
let x = min((t - a) * animation_speed, 1)
let y = max(1 - (t - b) * animation_speed, 0)
let page_offset_y_2_ratio = (a > b) * x + (a <= b) * y

let x = 4 * page_offset_y_2_ratio * page_offset_y_2_ratio * page_offset_y_2_ratio
let y = 1 - (-2 * page_offset_y_2_ratio + 2) * (-2 * page_offset_y_2_ratio + 2) * (-2 * page_offset_y_2_ratio + 2) / 2
let page_offset_y_2_ratio_eased = (page_offset_y_2_ratio < 0.5) * x + (page_offset_y_2_ratio >= 0.5) * y
let page_offset_y_2 = page_offset_y_2_ratio_eased * 2 * top
# ---

# o
let tmp_rect = [page_offset_x_1 + page_offset_x_2 + page_offset_x_3, page_offset_y_1 + page_offset_y_2, 0.1, 0.1]
img(id: o11, url: "https://teamflos.github.io/phira-docs/assets/uml/advanced/page_switch/blank.png", r: tmp_rect, t:fit)

let tmp_rect = [o11.l + 2, o11.t, 0.1, 0.1]
img(id: o12, url: "https://teamflos.github.io/phira-docs/assets/uml/advanced/page_switch/blank.png", r: tmp_rect, t:fit)

let tmp_rect = [o11.l + 4, o11.t, 0.1, 0.1]
img(id: o13, url: "https://teamflos.github.io/phira-docs/assets/uml/advanced/page_switch/blank.png", r: tmp_rect, t:fit)

let tmp_rect = [o11.l + 6, o11.t, 0.1, 0.1]
img(id: o14, url: "https://teamflos.github.io/phira-docs/assets/uml/advanced/page_switch/blank.png", r: tmp_rect, t:fit)

#>if(page_offset_y_1_ratio)
let tmp_rect = [o12.l, o11.t - 2 * top, 0.1, 0.1]
img(id: o22, url: "https://teamflos.github.io/phira-docs/assets/uml/advanced/page_switch/blank.png", r: tmp_rect, t:fit)
#>fi

#>if(page_offset_y_2_ratio)
let tmp_rect = [o12.l, o11.t - 4 * top, 0.1, 0.1]
img(id: o32, url: "https://teamflos.github.io/phira-docs/assets/uml/advanced/page_switch/blank.png", r: tmp_rect, t:fit)
#>fi

# btn_lr_1234
let tmp_rect = [o12.l - 0.1, o11.t + top - 0.05, 0.1, 0.1]
img(id: btn_r_1_bkg, url: "https://teamflos.github.io/phira-docs/assets/uml/advanced/page_switch/right_arrow.png", r: tmp_rect, t:fit)
btn(id: btn_r_1, r: tmp_rect, t:fit)

let tmp_rect = [o12.l, o12.t + top - 0.05, 0.1, 0.1]
img(id: btn_l_2_bkg, url: "https://teamflos.github.io/phira-docs/assets/uml/advanced/page_switch/left_arrow.png", r: tmp_rect, t:fit)
btn(id: btn_l_2, r: tmp_rect, t:fit)

let tmp_rect = [o13.l - 0.1, o12.t + top - 0.05, 0.1, 0.1]
img(id: btn_r_2_bkg, url: "https://teamflos.github.io/phira-docs/assets/uml/advanced/page_switch/right_arrow.png", r: tmp_rect, t:fit)
btn(id: btn_r_2, r: tmp_rect, t:fit)

let tmp_rect = [o13.l, o13.t + top - 0.05, 0.1, 0.1]
img(id: btn_l_3_bkg, url: "https://teamflos.github.io/phira-docs/assets/uml/advanced/page_switch/left_arrow.png", r: tmp_rect, t:fit)
btn(id: btn_l_3, r: tmp_rect, t:fit)

let tmp_rect = [o14.l - 0.1, o13.t + top - 0.05, 0.1, 0.1]
img(id: btn_r_3_bkg, url: "https://teamflos.github.io/phira-docs/assets/uml/advanced/page_switch/right_arrow.png", r: tmp_rect, t:fit)
btn(id: btn_r_3, r: tmp_rect, t:fit)

let tmp_rect = [o14.l, o14.t + top - 0.05, 0.1, 0.1]
img(id: btn_l_4_bkg, url: "https://teamflos.github.io/phira-docs/assets/uml/advanced/page_switch/left_arrow.png", r: tmp_rect, t:fit)
btn(id: btn_l_4, r: tmp_rect, t:fit)

# btn_ud_123
let tmp_rect = [o12.l + 1 - 0.05, o12.t, 0.1, 0.1]
img(id: btn_u_1_bkg, url: "https://teamflos.github.io/phira-docs/assets/uml/advanced/page_switch/up_arrow.png", r: tmp_rect, t:fit)
btn(id: btn_u_1, r: tmp_rect, t:fit)

#>if(page_offset_y_1_ratio)
let tmp_rect = [o22.l + 1 - 0.05, o12.t - 0.1, 0.1, 0.1]
img(id: btn_d_2_bkg, url: "https://teamflos.github.io/phira-docs/assets/uml/advanced/page_switch/down_arrow.png", r: tmp_rect, t:fit)
btn(id: btn_d_2, r: tmp_rect, t:fit)

let tmp_rect = [o22.l + 1 - 0.05, o22.t, 0.1, 0.1]
img(id: btn_u_2_bkg, url: "https://teamflos.github.io/phira-docs/assets/uml/advanced/page_switch/up_arrow.png", r: tmp_rect, t:fit)
btn(id: btn_u_2, r: tmp_rect, t:fit)
#>fi

#>if(page_offset_y_2_ratio)
let tmp_rect = [o32.l + 1 - 0.05, o22.t - 0.1, 0.1, 0.1]
img(id: btn_d_3_bkg, url: "https://teamflos.github.io/phira-docs/assets/uml/advanced/page_switch/down_arrow.png", r: tmp_rect, t:fit)
btn(id: btn_d_3, r: tmp_rect, t:fit)
#>fi

let $h = 2 * top - 0.02
构建指南
针对安卓手机的Linux便携式开发环境构建:here
Windows:here
Linux:here
什么,你说apk?没有Java和kotlin我怎么写啊QAQ
Cargo 安装
Windows
-
点击 这里 下载构建工具安装程序。
-
双击打开
rustup-init.exe后出现安装窗口;输入2然后输入y然后再次输入2,然后输入x86_64-pc-windows-gnu,最后一路回车开始安装,直到输出Rust is installed now. Great!- 注意:千万不要直接回车安装 MSVC,这在后续构建将会出现大量问题!
-
前往 MSYS2 官网下载 MSYS2 安装程序,下载完成后双击打开,如无特殊需求,一路下一步即可,直到提示
Finished the MSYS2 Setup,点击右下角的按钮后将弹出一个窗口,输入以下指令,安装过程一路回车即可。pacman -Sy && pacman -Syu
pacman -S mingw-w64-x86_64-toolchain
- 如果您无法连接到 github,您也可以去 缓存站 下载 MSYS2, 注意,缓存站只能保证您可以下载,不能高速下载,也不一定是最新版。
-
打开命令提示符(cmd)或 PowerShell,输入
cargo -V检查是否成功安装,若返回版本号则安装成功,若出现其他提示,请见 Windows 常见问题。 -
按下图所示,修改环境变量

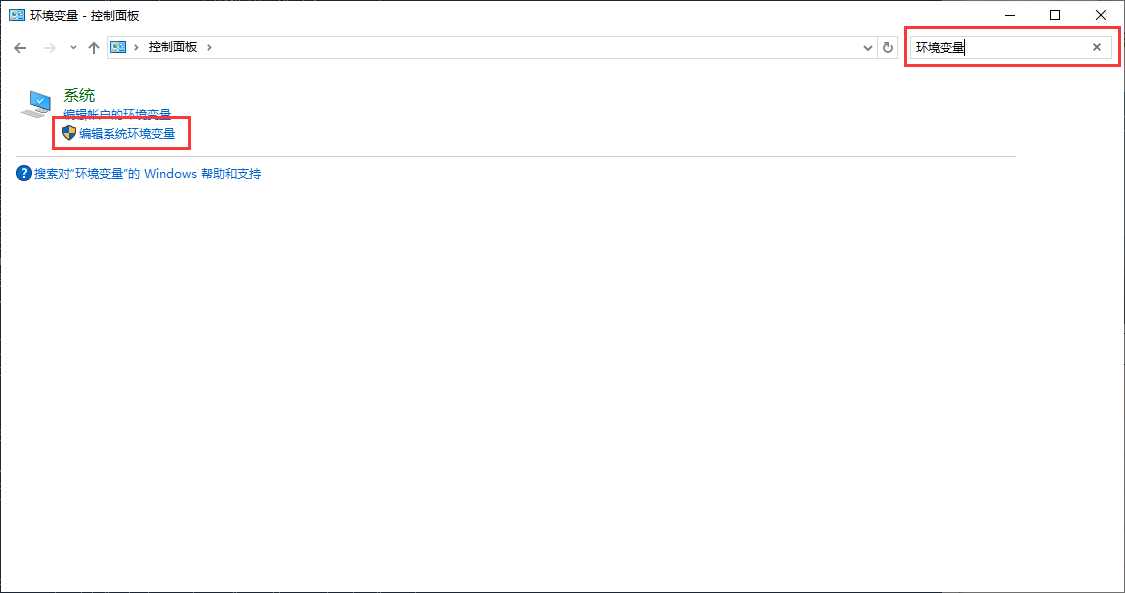
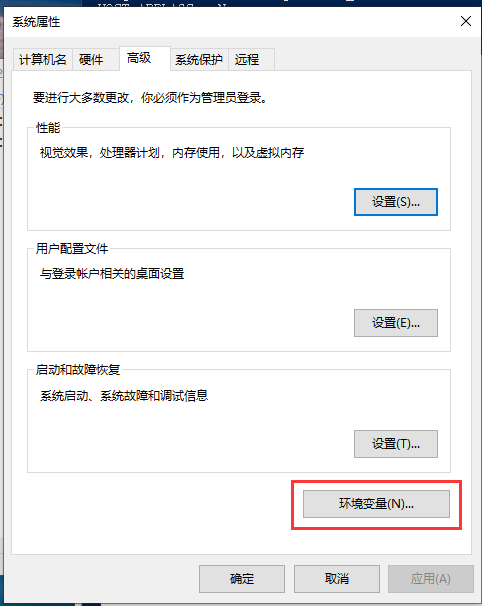

-
打开命令提示符(cmd)或 PowerShell,输入
gcc -v检查是否成功安装,若返回版本号则安装成功,若出现其他提示,请见 Windows 常见问题。
Windows 常见问题
Q. 双击运行下载成功后的构建工具闪退
A. 请不要更改文件名
Linux
Debian 分支 Linux 系统
-
打开终端,输入以下命令:
sudo apt update
sudo apt install cargo -y
-
若无报错,输入
cargo -V检查是否输出版本号,若出现其他输出,请见 Linux 常见问题
其他系统待补充
Linux 常见问题
Q. 输入 cargo 时输出 bash: /usr/bin/cargo: No such file or directory 或 cargo: command not found
A. 未成功安装 cargo,请检查安装完成后是否输出了其他信息。
Windows
准备阶段
- 确保系统安装了 cargo,可以在命令提示符(cmd)或者 PowerShell 使用
cargo -V检查系统是否安装了 cargo。如果提示以下信息:'cargo' 不是内部或外部命令,也不是可运行的程序或批处理文件。cargo : 无法将“cargo”项识别为 cmdlet、函数、脚本文件或可运行程序的名称。请检查名称的拼写,如果包括路径,请确保路径正确,然后再试一次。- 请点击 这里 按步骤安装构建工具
- 从 GitHub 下载源码到本地:
- 若您安装了 git 工具,请使用
git clone https://github.com/TeamFlos/phira.git将仓库克隆到本地。 - 若您没有安装 git 工具,您也可以在 Phira 仓库页面点击 Code 按钮选择
Download ZIP将代码下载到本地,随后将代码解压到本地任意目录。 - 如果您无法连接到 GitHub,您也可以使用 git 加速网站提供的加速地址克隆与下载。
- 若您要构建指定版本的 Phira,请前往 release 页面在 Assets 中选择下载
Source code(zip)到本地,解压到任意路径即可。 - 警告:为了防止玄学问题,我们不建议路径中包含除了 ASCII 编码包含字符以外的任何字符。
- 若您安装了 git 工具,请使用
- perl,您可以在命令提示符(cmd)或者 PowerShell 使用
perl -v检查系统是否安装了 perl,如果没有,请搜索并打开MSYS2 UCRT64输入pacman -S perl安装 perl - 静态库文件,您可以 直接下载 或者在 缓存站 下载静态库文件,下载完成后直接解压到代码根目录下,如果提示覆盖文件,请点击覆盖。
开始构建
- 在命令提示符(cmd)或者 PowerShell 切换到代码根目录(如
D:\phira\) - 在命令提示符(cmd)或者 PowerShell 使用
cargo build -r --bin phira-main,如果不出意外,在openssl-sys(build)时,您将卡很久很久,请不要退出,这是正常的。 - 构建完成后,在
.\target\release\目录下您可以找到编译完成的主程序 - 复制
.\assets\目录中的所有文件到.\target\release\assets\,至此,构建流程全部完成,您可以直接运行phira-main.exe检查资源文件是否完整。
- 注意:在此文档编写时,代码目录下的资源文件并不完整,如果您发现主程序闪退,您可以前往 release 页面下载任意版本,获取资源文件
32位版本
- 在命令提示符(cmd)或者 PowerShell 切换到代码根目录(如
D:\phira\) - 下载上面的静态库文件解压到
phira\prpr-avc\static-lib或自行构建 - 在命令提示符(cmd)或者 PowerShell 使用
cargo build --target=i686-pc-windows-gnu --release --package phira-main,如果不出意外,在openssl-sys(build)时,您将卡很久很久,请不要退出,这是正常的。 - 构建完成后,在
.\target\release\目录下您可以找到编译完成的主程序 - 复制
.\assets\目录中的所有文件到.\target\release\assets\,至此,构建流程全部完成,您可以直接运行phira-main.exe检查资源文件是否完整。
有关静态库的构建(以i686-pc-windows-gnu为例)
在sh上操作(此处使用msys2)
git clone https://git.ffmpeg.org/ffmpeg.git --depth=1
cd ffmpeg && mkdir build && cd build
../configure --disable-programs --disable-doc --disable-everything --disable-debug --arch=i686 --target_os=mingw32 --cross-prefix=i686-w64-mingw32-
make
note:这里有个坑。。。如果报错的话尝试把 msys64\mingw32\bin 这个目录下的 i686-w64-mingw32-gcc-ar.exe , i686-w64-mingw32-gcc-nm.exe , i686-w64-mingw32-gcc-ranlib.exe 复制粘贴一份然后重命名成 i686-w64-mingw32-ar.exe , i686-w64-mingw32-nm.exe , i686-w64-mingw32-ranlib.exe
接着把build文件夹下的所有形如 *.a 的文件复制到 phira\prpr-avc\static-lib\i686-pc-windows-gnu 就可以啦
常见问题
Q. 报错 failed to send request: 操作超时
A. 请检查网络环境,确保您可以正常访问 GitHub
Q. 报错 failed to send request: 无法解析服务器的名称或地址
A. 检查 DNS 或更换 DNS,更换后请刷新 DNS 缓存
Q. 构建过程中报错 error: failed to run custom build command for openssl-sys v0.9.99
A. 缺失 perl,请检查是否正确安装 perl 后再试
Q. 构建报错error occurred: Failed to find tool. Is gcc.exe installed? (see https://github.com/rust-lang/cc-rs#compile-time-requirements for help)
A. 请检查是否安装了 MSYS2 以及检查是否配置了环境变量
Q. 出现以下报错:
Error building OpenSSL dependencies:
Command: “make” “depend”
Failed to execute: program not found
A. 缺失 make 指令,请前往 MSYS2 终端中使用 pacman -S make 安装此命令。
Q. 报错包含 This perl inplementation doesn't produce lnix like paths
A. 使用的 perl 不适用于 gcc,请删除原有 perl 的环境变量或者直接卸载原有的 perl。
Q. 报错包含undefined reference to libiconv
A. 使用的 libiconv 有问题,请在 MSYS2 终端中使用 pacman -S libiconv
Q. 太麻烦了
A. 这样,直接去 release 页面下吧微软我真谢谢你
Linux
准备阶段
-
确保系统安装了 cargo,可以在终端使用
cargo -V检查系统是否安装了 cargo,如果没有安装,请点击 这里按步骤安装构建工具 -
从 GitHub 下载源码到本地:
- 若您是纯终端,建议使用 git 工具,请使用
git clone https://github.com/TeamFlos/phira.git将仓库克隆到本地。 - 若您使用了桌面环境,您也可以在 Phira 仓库页面点击 Code 按钮选择
Download ZIP将代码下载到本地,随后将代码解压到本地任意目录。 - 如果您无法连接到 GitHub,您也可以使用 git 加速网站提供的加速地址克隆与下载。
- 若您要构建指定版本的 Phira,请前往 release 页面在 Assets 中选择下载
Source code(tar.gz)到本地,解压到任意路径即可。 - 警告:为了防止玄学问题,我们不建议路径中包含除了 ASCII 编码包含字符以外的任何字符。
- 若您是纯终端,建议使用 git 工具,请使用
-
静态库文件,您可以 直接下载 或者在 缓存站 下载静态库文件,下载完成后直接解压到代码根目录下,如果提示覆盖文件,请点击覆盖。
-
构建过程需要库文件补充,输入以下命令即可:
sudo apt update
sudo apt install libasound2-dev
sudo apt install libgtk-3-dev
开始构建
- 打开终端,切换到代码根目录
- 输入
cargo build -r --bin phira-main,直到编译完成。 - 复制
.\assets\目录中的所有文件到.\target\release\assets\,至此,构建流程全部完成,您可以在带有桌面环境的情况下直接运行phira-main检查资源文件是否完整,若您没有桌面环境,程序将会闪退(实测 WSL 无法兼容,如果在 WSL 下运行将会闪退),至此,构建流程结束。
- 注意:在此文档编写时,代码目录下的资源文件并不完整,如果您发现主程序闪退,您可以前往 release 页面下载任意版本,获取资源文件
常见问题
Q. 构建输出 failed to connect to GitHub
A. 请检查网络环境。
Q. 构建时报错 The pkg-config command could not be found
A. 缺失 pkg-config 指令,使用 sudo apt install pkg-config -y 安装即可。
Q. 构建报错 failed to run custom build command for alsa-sys v0.3.1
A. 缺失库文件
Android
构建
注意:此构建方案的产物不包含成绩上传的部分(与Windows端类似)
- 方便起见,这里使用Github Action构建Android端Phira,本地构建待补充。
才不是因为几次都失败了惹 - Fork官方Phira仓库,创建
.github/workflows/目录并在该目录下创建一个.yml文件,名称任意。 - 在该.yml文件写入以下内容并commit,进入Action页面的Build Android Phira工作流,请求一个workflow(可选择构建分支),等待约5分钟,工作流即可运行完毕。下载Artifact解压备用。
如果需要armeabi-v7a架构构建,请将“arm64-v8a“,“aarch64-linux-android“分别全部替换为“armeabi-v7a”,“armv7-linux-androideabi”(未测试)
name: Build Android Phira

on:
  workflow_dispatch:


env:
  CARGO_TERM_COLOR: always
  ANDROID_HOME: ${{github.workspace}}/android-sdk
  ANDROID_NDK_HOME: ${{github.workspace}}/android-ndk-r27c
  ANDROID_NDK_ROOT: ${{github.workspace}}/android-ndk-r27c

jobs:
  Build:

    runs-on: ubuntu-24.04

    steps:
    - uses: actions/checkout@v4.2.2

    - run: |
        sudo apt-get update
        sudo apt-get install -y libgtk-3-dev libwebkit2gtk-4.1-dev libayatana-appindicator3-dev librsvg2-dev libasound2-dev libssl-dev pkg-config
        # For compatibility of release v0.6.7 and stable channel of Rust
        sed -i 's/#!\[feature(local_key_cell_methods)\]//g' prpr/src/lib.rs

    - name: Download static-lib
      uses: suisei-cn/actions-download-file@v1.3.0
      id: downlod-static-lib
      with:
        url: "https://teamflos.github.io/phira-docs/phira_build_guide/prpr-avc.zip"
        target: ./

    - name: Set Up static-lib
      run: |
        unzip prpr-avc.zip -d ./

    - name: Install Android SDK Tools
      run: |
        wget https://dl.google.com/android/repository/commandlinetools-linux-8512546_latest.zip
        unzip commandlinetools-linux-8512546_latest.zip -d $ANDROID_HOME
        echo y | $ANDROID_HOME/cmdline-tools/bin/sdkmanager --sdk_root=${ANDROID_HOME} "platform-tools" "build-tools;33.0.2" "platforms;android-35"

    - name: Install Android NDK
      run: |
        wget https://googledownloads.cn/android/repository/android-ndk-r27c-linux.zip
        unzip android-ndk-r27c-linux.zip -d ${{github.workspace}}

    - name: Install Rust Toolchains
      uses: actions-rs/toolchain@v1.0.6
      with:
        toolchain: stable
        target: aarch64-linux-android

    - name: Build for Android
      run: |
        cd phira
        cargo install cargo-ndk
        cargo ndk -t arm64-v8a --platform 35 build --release

    - name: Upload Artifact
      uses: actions/upload-artifact@v4
      with:
        name: android-build
        path: |
          target/aarch64-linux-android/release/libphira.so
替换
由于未提供打包工具,需要我们手动替换apk下libphira.so文件
直接安装运行,会提示找不到quad_native.QuadNative.preprocessInput的定义
方法一:
-
将libphira.so文件推送到Android设备上你熟悉的位置。
-
从Phira官方仓库的Release下载libphira.so对应架构的apk,用MT管理器查看。
-
将构建出来的libphira.so替换掉lib/arm64-v8a(或armeabi-v7a)/libphira.so。
-
用Dex编辑器++打开classes.dex,进入org,flos.phira,查看QuadSurface类。
-
找到153行(或其他调用preprocessInput的语句),移除这一行的内容(或注释掉)。
-
根据MT管理器的提示,保存退出文件,重新签名。
-
按需可选择进行apk共存操作。
方法二:
在phira/src/lib.rs中加入以下声明:
#[cfg(target_os = "android")]
#[no_mangle]
pub unsafe extern "C" fn Java_quad_1native_QuadNative_preprocessInput(
    _: *mut std::ffi::c_void,
    _: *const std::ffi::c_void,
    #[allow(dead_code)] motionEvent: ndk_sys::AInputEvent,
    #[allow(dead_code)] f: ndk_sys::jfloat,
    #[allow(dead_code)] f2: ndk_sys::jfloat,
    #[allow(dead_code)] z: ndk_sys::jboolean,
    #[allow(dead_code)] z2: ndk_sys::jboolean,
) {

}
原理
- 特别感谢qaqFei进行的测试。
开发/运营过程中出现的意外事件
其实全都是 sjfhsjfh 的错
长风的柳絮
此事件发生于 2023-07-10 18:53 (此为 sjfhsjfh 在内部群发送消息 “我来磕大头了” 的时间)
事件经过
sjfhsjfh 在手动操作数据库(使用 SQL 语句)封禁用户 “长风的柳絮“时, 一不小心将未写完的 UPDATE 语句发送出去(没有加上 WHERE 关键字, 也没有写好 SET banned = TRUE), 导致所有用户的用户名被修改为 “长风的柳絮”
此事件耗费 Mivik 一整个下午和晚自习进行恢复(从日志中), 并未造成太多数据损失
后记
凡事都要两面看, 此事过后 Mivik 给审核组长提供了一个方便快捷的封禁按钮, 以防止类似事件再次发生. 不幸的是, sjfhsjfh 的扫帚星属性并未因此事件而消失, 见 v0.6.0 更新消息
v0.6.0 Update
此事件发生于 2024-01-01 23:16 (此为 Mivik 在上架讨论群内发送消息 “阿我草你干了啥?” 的时间)
同 长风的柳絮 事件类似, 为手动操作数据库造成的严重后果. 此事件也被称为 “长风的柳絮 2”
事件经过
sjfhsjfh 企图修改误放出的错误公告, 且心急如焚, 故不当操作导致所有用户的所有消息内容被修改为新的公告内容(即 v0.6.0 更新公告)
此事件耗费 Mivik 约一个晚上进行恢复, 当天的消息全部丢失
6thPecJam
此事件发生于 2024-02-10 凌晨约 00:40, 相较于预计的 PecJam 提交通道开启时间 2024-02-10 00:00, 已经推迟超多半个小时
注: 2024-02-09 为除夕, 大家都在守岁, 正好等着 PecJam 交稿
事件经过
sjfhsjfh 眼看大家在群里询问为何 PecJam 提交通道还未开启, 在焦急之中对 Phira 后端代码进行了胡乱修改, 提交时甚至没有进行编译检查, 最后不得不请 Mivik 从温暖的被窝中出来帮忙修复, 实在是罪大恶极
天空之城
此事件发生于 2024-04-13 19:00 (此为 大鸽子咕咕咕 在上架讨论群内发送“谁想要业绩可以看看这个,四票打回了还是这个状态,不知道是不是bug”的时间)
事件经过
评议员在打回谱面时若网络情况较差就会出现已拒绝但没有打回的现象,由此吸引了14位评议员先后参与了天空之城的打回操作
以下为参与了打回的评议员列表:
无人通过
14 人拒绝:超爱吃盐的盐盐,twotthrees233,右果ary,WinterPT,scylic,远空星灵,SSuent_,-zerouth-,StR-1,sjfhsjfh,Max3957,Kedmue,Dr.Asriel,Naptie
……为什么 sjfhsjfh 也在里面
最终因 Naptie 使用了 “润润润牌私有连接” 而成功触发打回操作,结束本谱战斗。 但战斗真的会结束吗?谁知道呢(
关于评议员的详细留言请看#15169 评议记录
Forever Young
此事件发生于 2024-05-25 凌晨 04:10 (此为 sjfhsjfh 在内部群发送消息 “吗的我又干蠢事了 [动画表情] 想原地紫砂” 的时间)
事件经过
sjfhsjfh 想干点事于是请求 Mivik 把动态分发的字体 bold.ttf 的步骤传授给我, 我来更新一下字符几来修复部分语言缺字的情况, 进展还算顺利, 可是到测试的时候, 根据反馈选择了法语随便点进一张 Stable 谱面(受害者出场: #16576 Forever Young), 再看到出问题的地方是删除确认提示框的时候脑袋短路了两秒, 觉得不太对但没停住手, 知道应该下载到本地删除本地文件, 但是下载了之后习惯性一翻到底点击删除在线. 这时候 sjfh 对着法语的 “Annuler” 和 “Confirmer” 两个按钮大脑开始飞速运转, 很明显能猜测到后者是确认, 但此时已经sjfh理智归零(考虑到此刻已经是明日方舟服务器每日计时更替之后了), 停留了没超过 0.5s 就点了确认, 于是就有了上面的聊天消息.
警钟敲烂